> ## Documentation Index
> Fetch the complete documentation index at: https://linkly.ai/docs/llms.txt
> Use this file to discover all available pages before exploring further.
# Using Linkly AI in QoderWork
> Connect your Linkly AI local knowledge base to QoderWork, letting the desktop AI work assistant search and read your private documents
## What You Can Do
When creating tasks in QoderWork, use the Linkly AI Connector to let AI
first search local documents, then combine browser automation, file
processing, and other tools to complete complex workflows grounded in real
materials.
Combine Linkly AI with Slack, Microsoft 365, Calendar, and other Connectors
to access both local documents and online services in a single task —
breaking down information silos.
Configure once, then share the same local knowledge base across all tasks
and conversations in QoderWork. AI retrieves on demand — no need to upload
attachments every time.
## Prerequisites
* [QoderWork](https://www.qoderwork.com) installed
* Linkly AI Desktop running with the MCP service active
## Configuration Steps
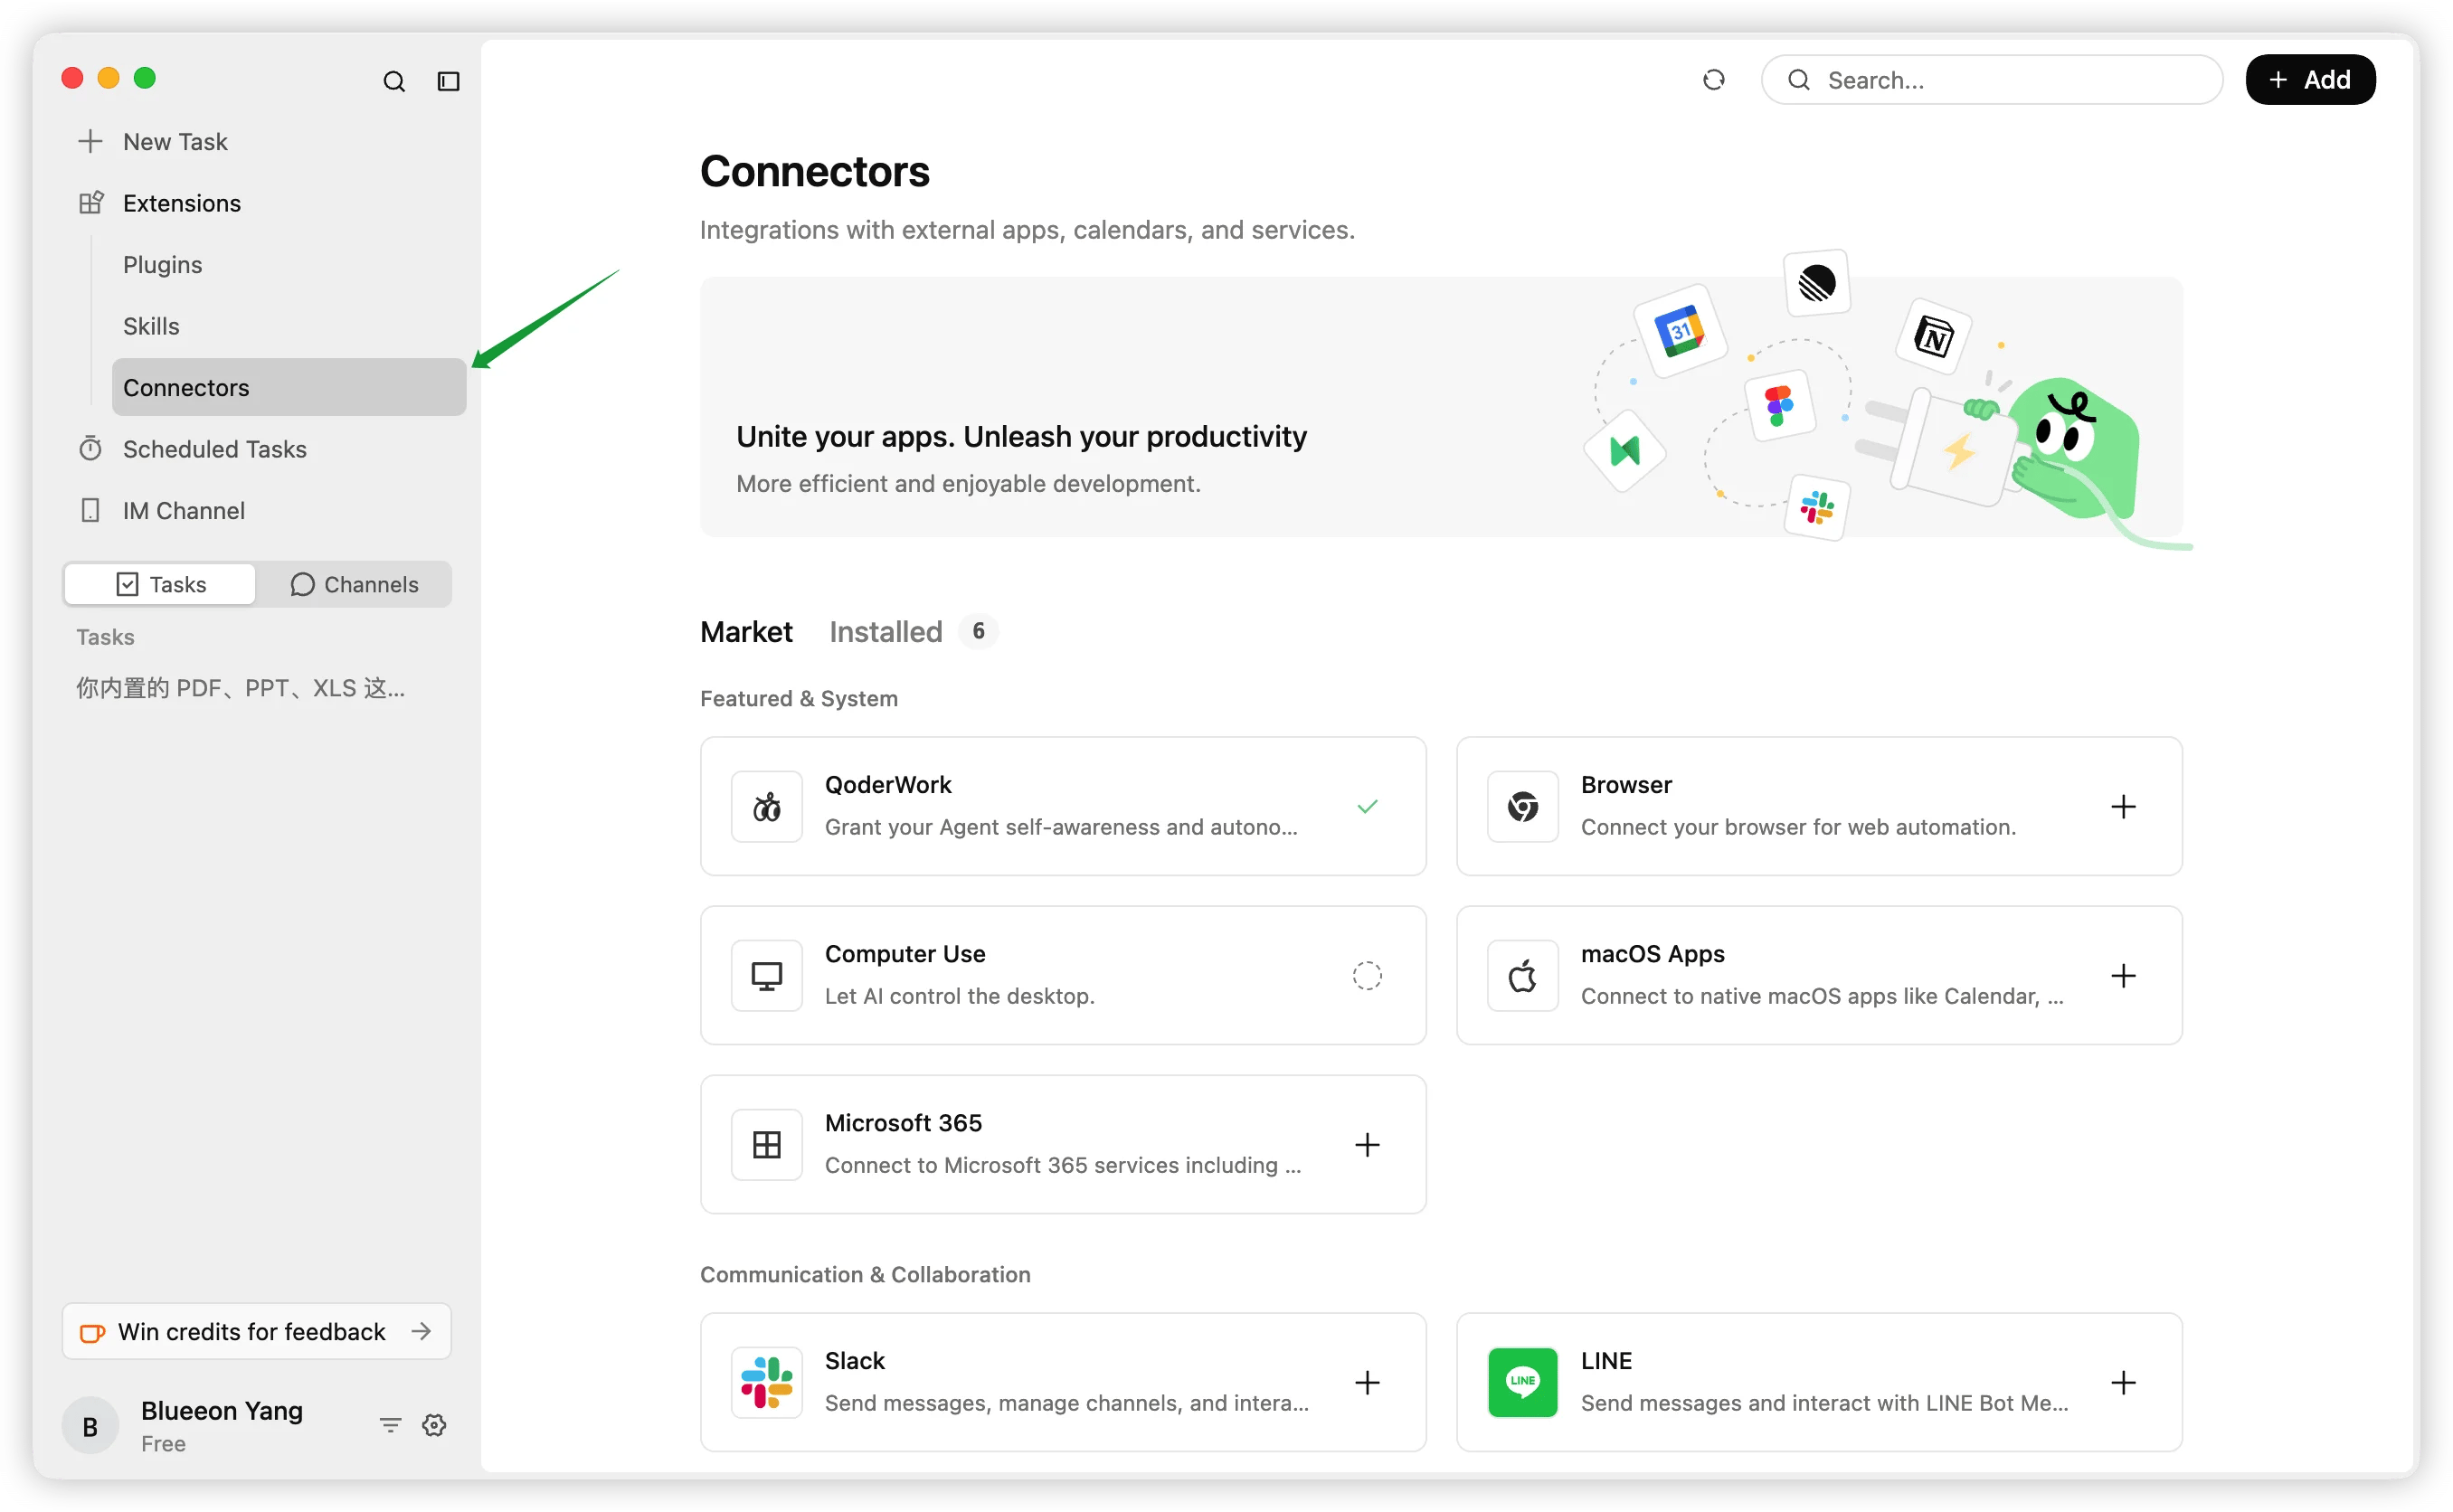
Click **Extensions → Connectors** in the left navigation.
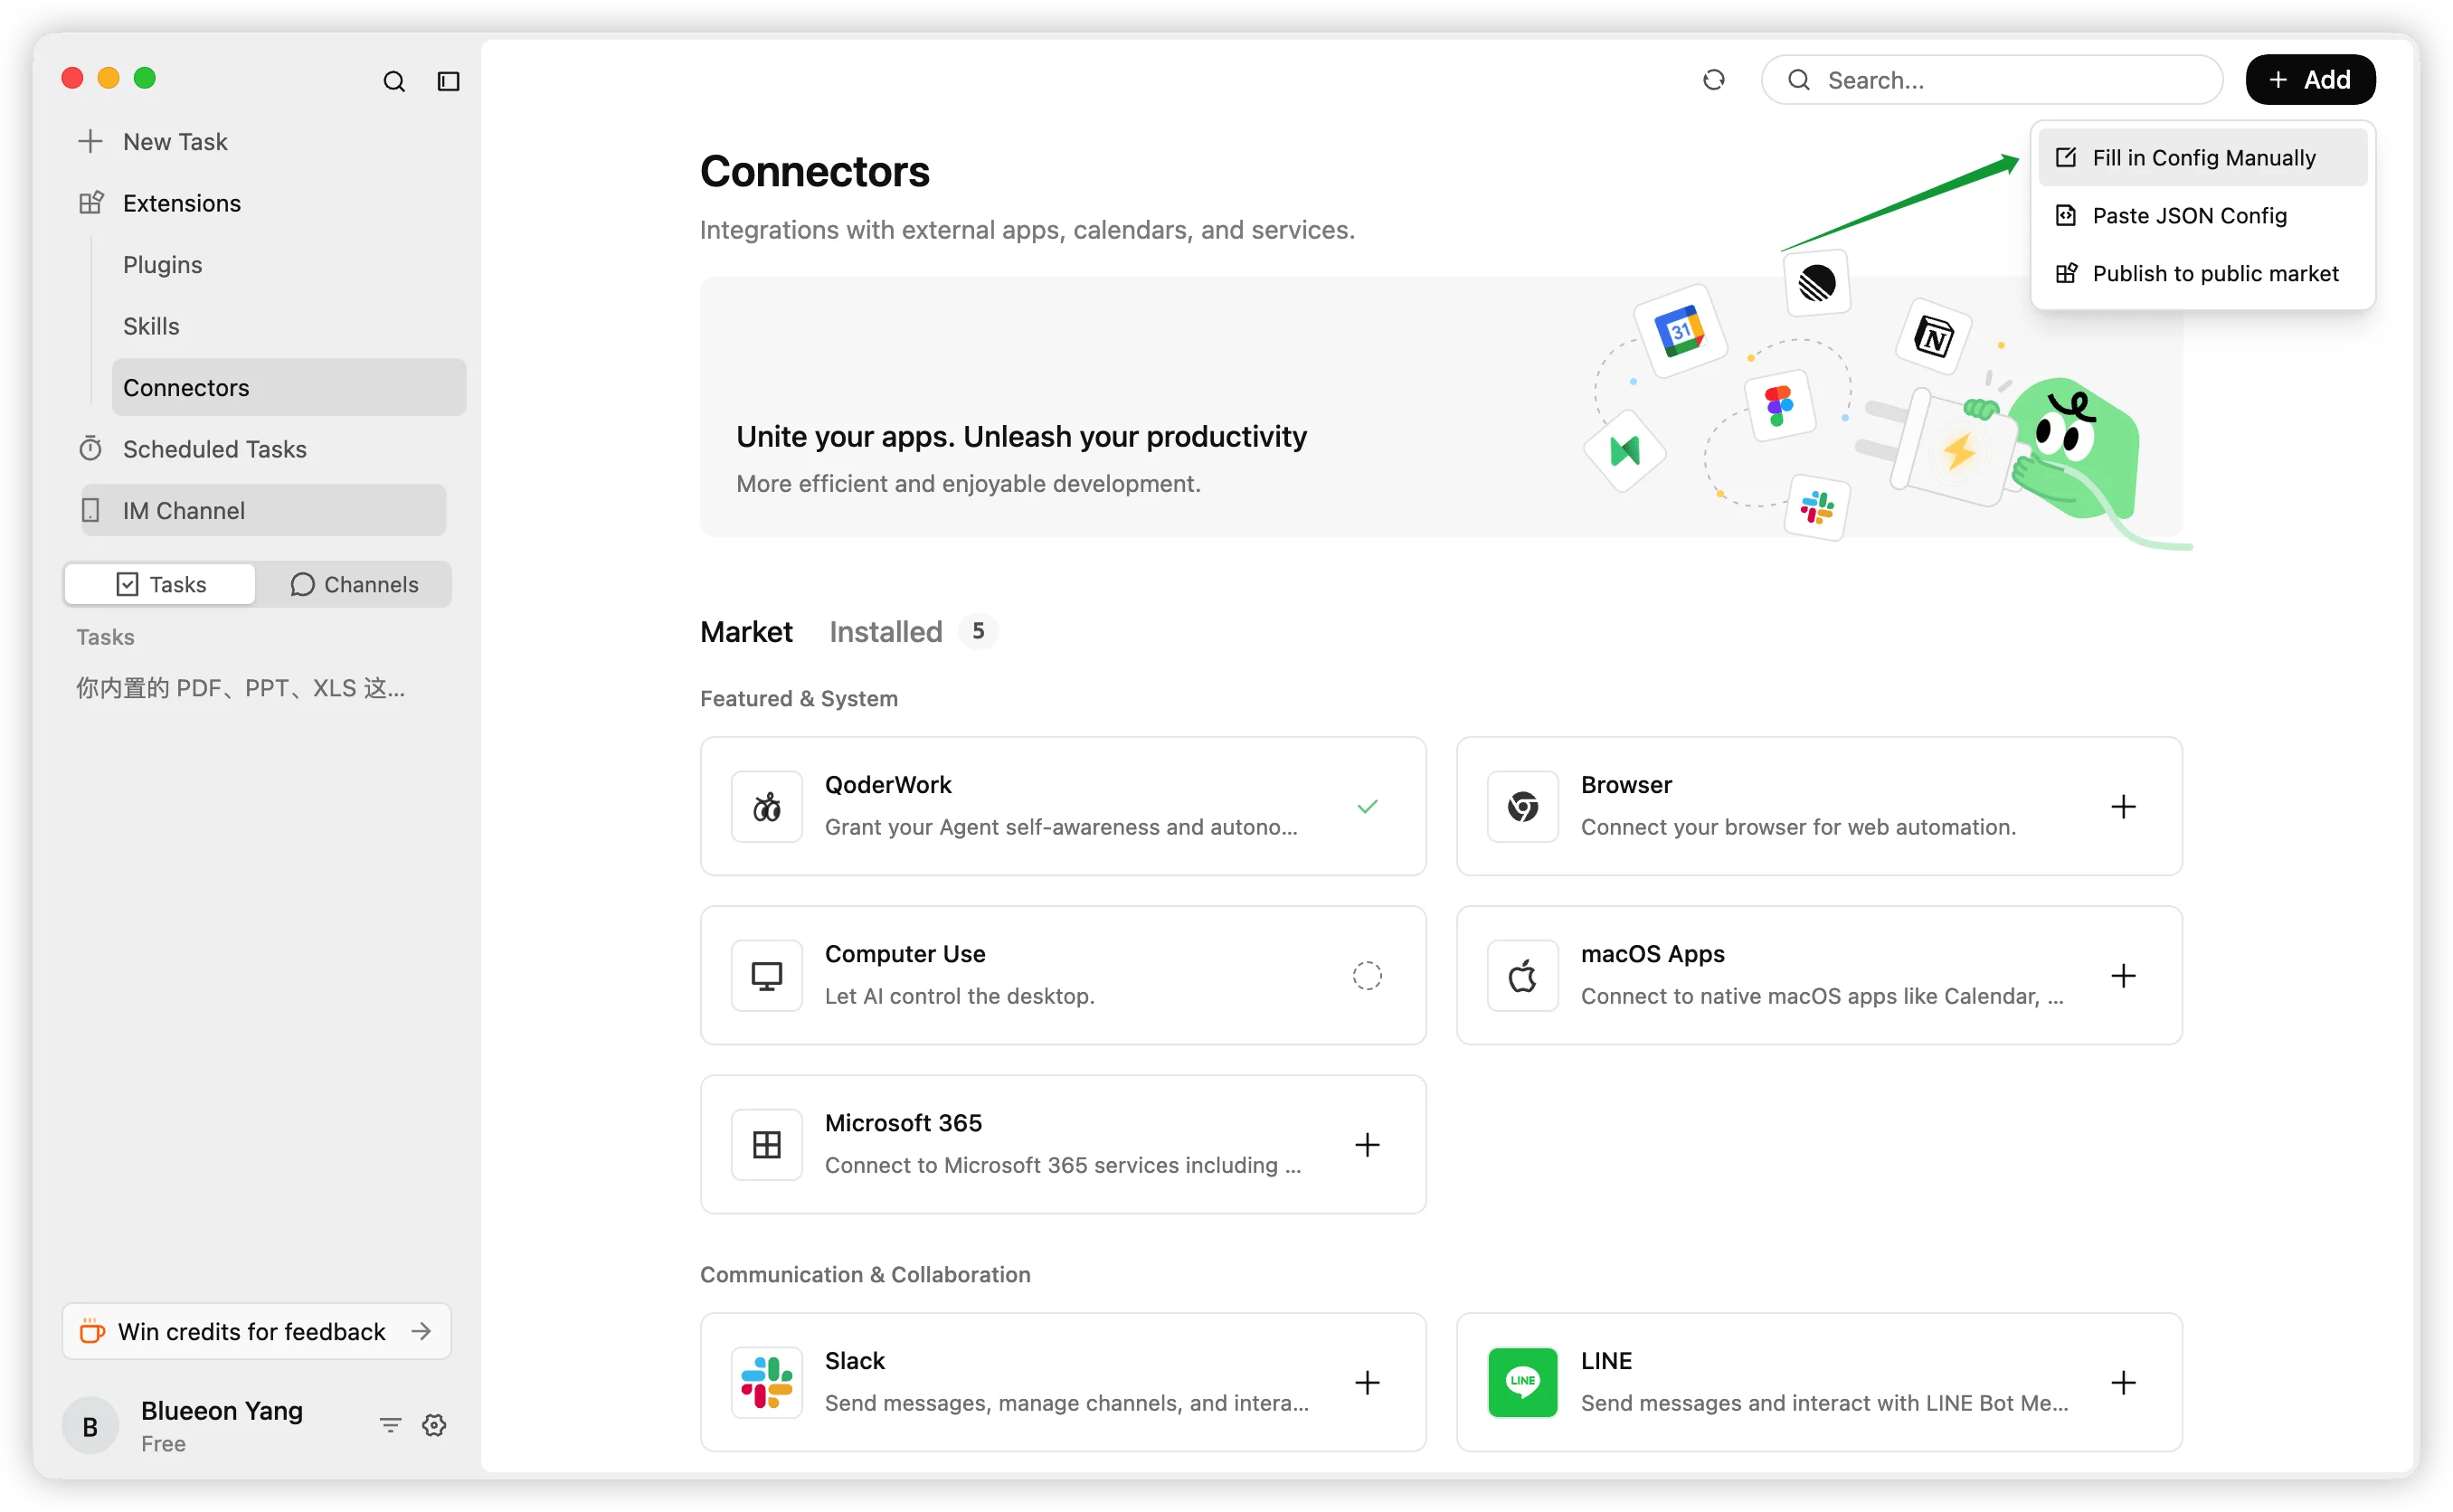
 Click **+ Add** in the top right, then select **Fill in Config
Manually** from the dropdown.
Click **+ Add** in the top right, then select **Fill in Config
Manually** from the dropdown.
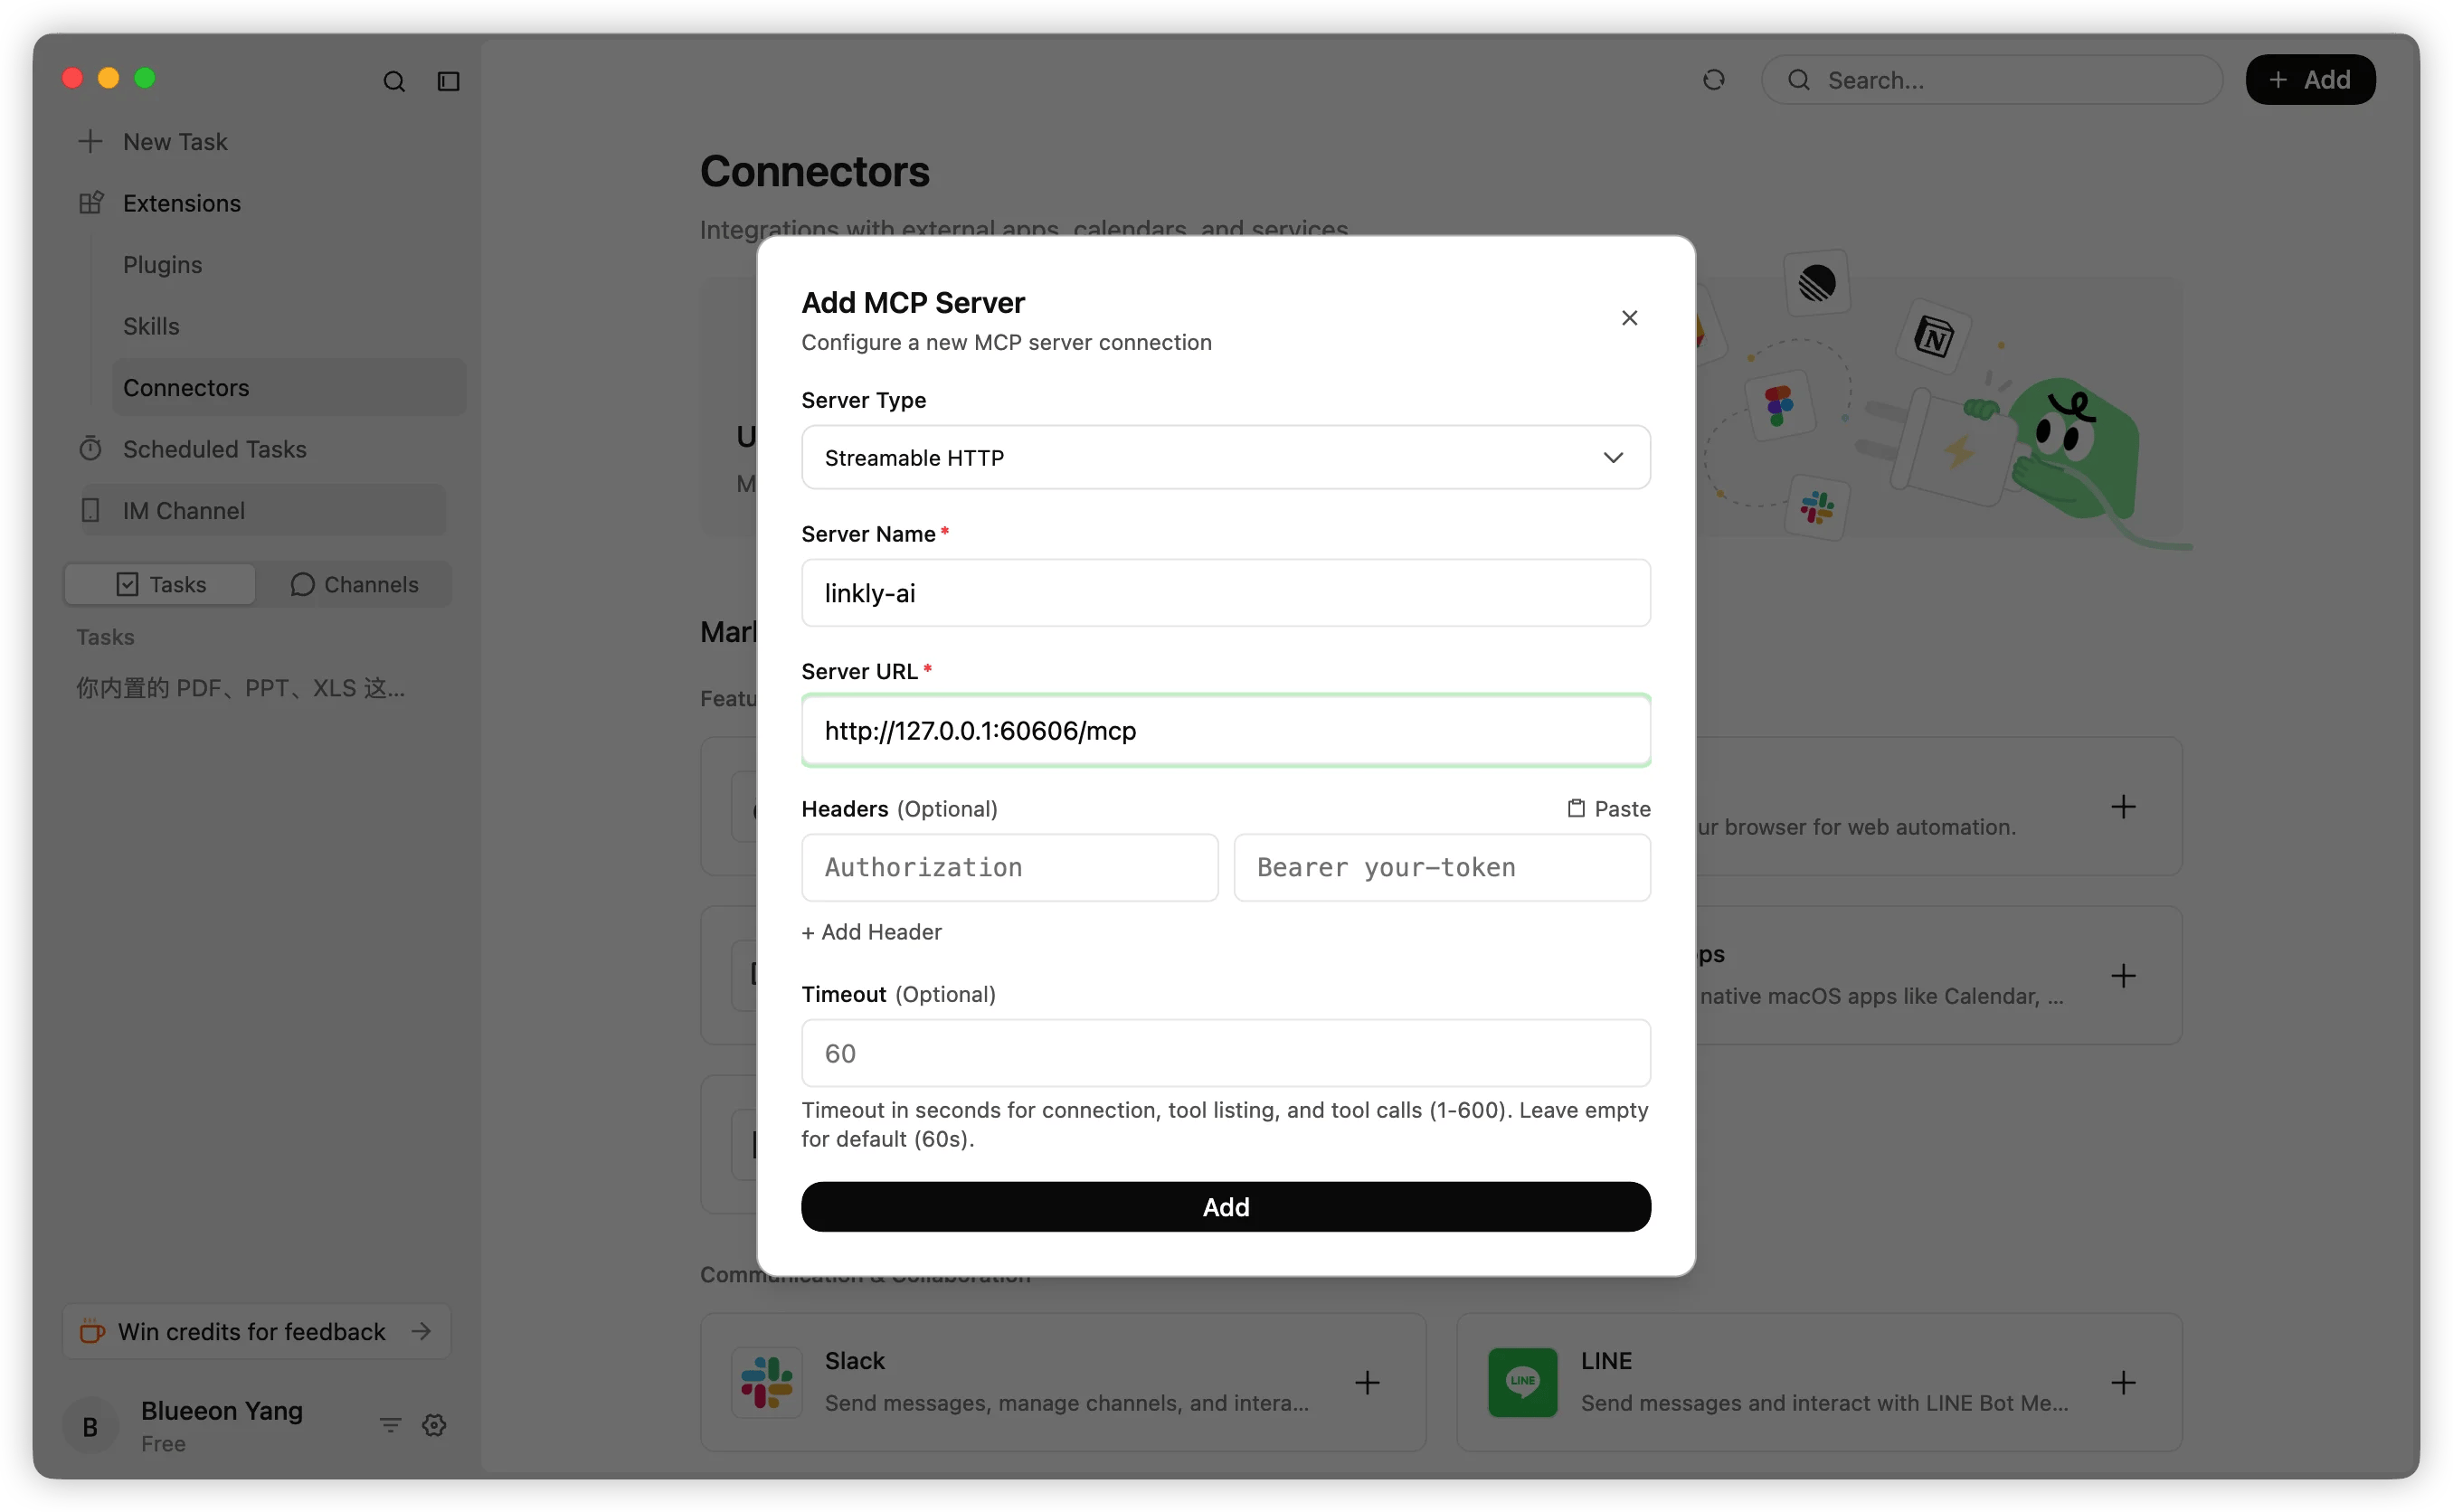
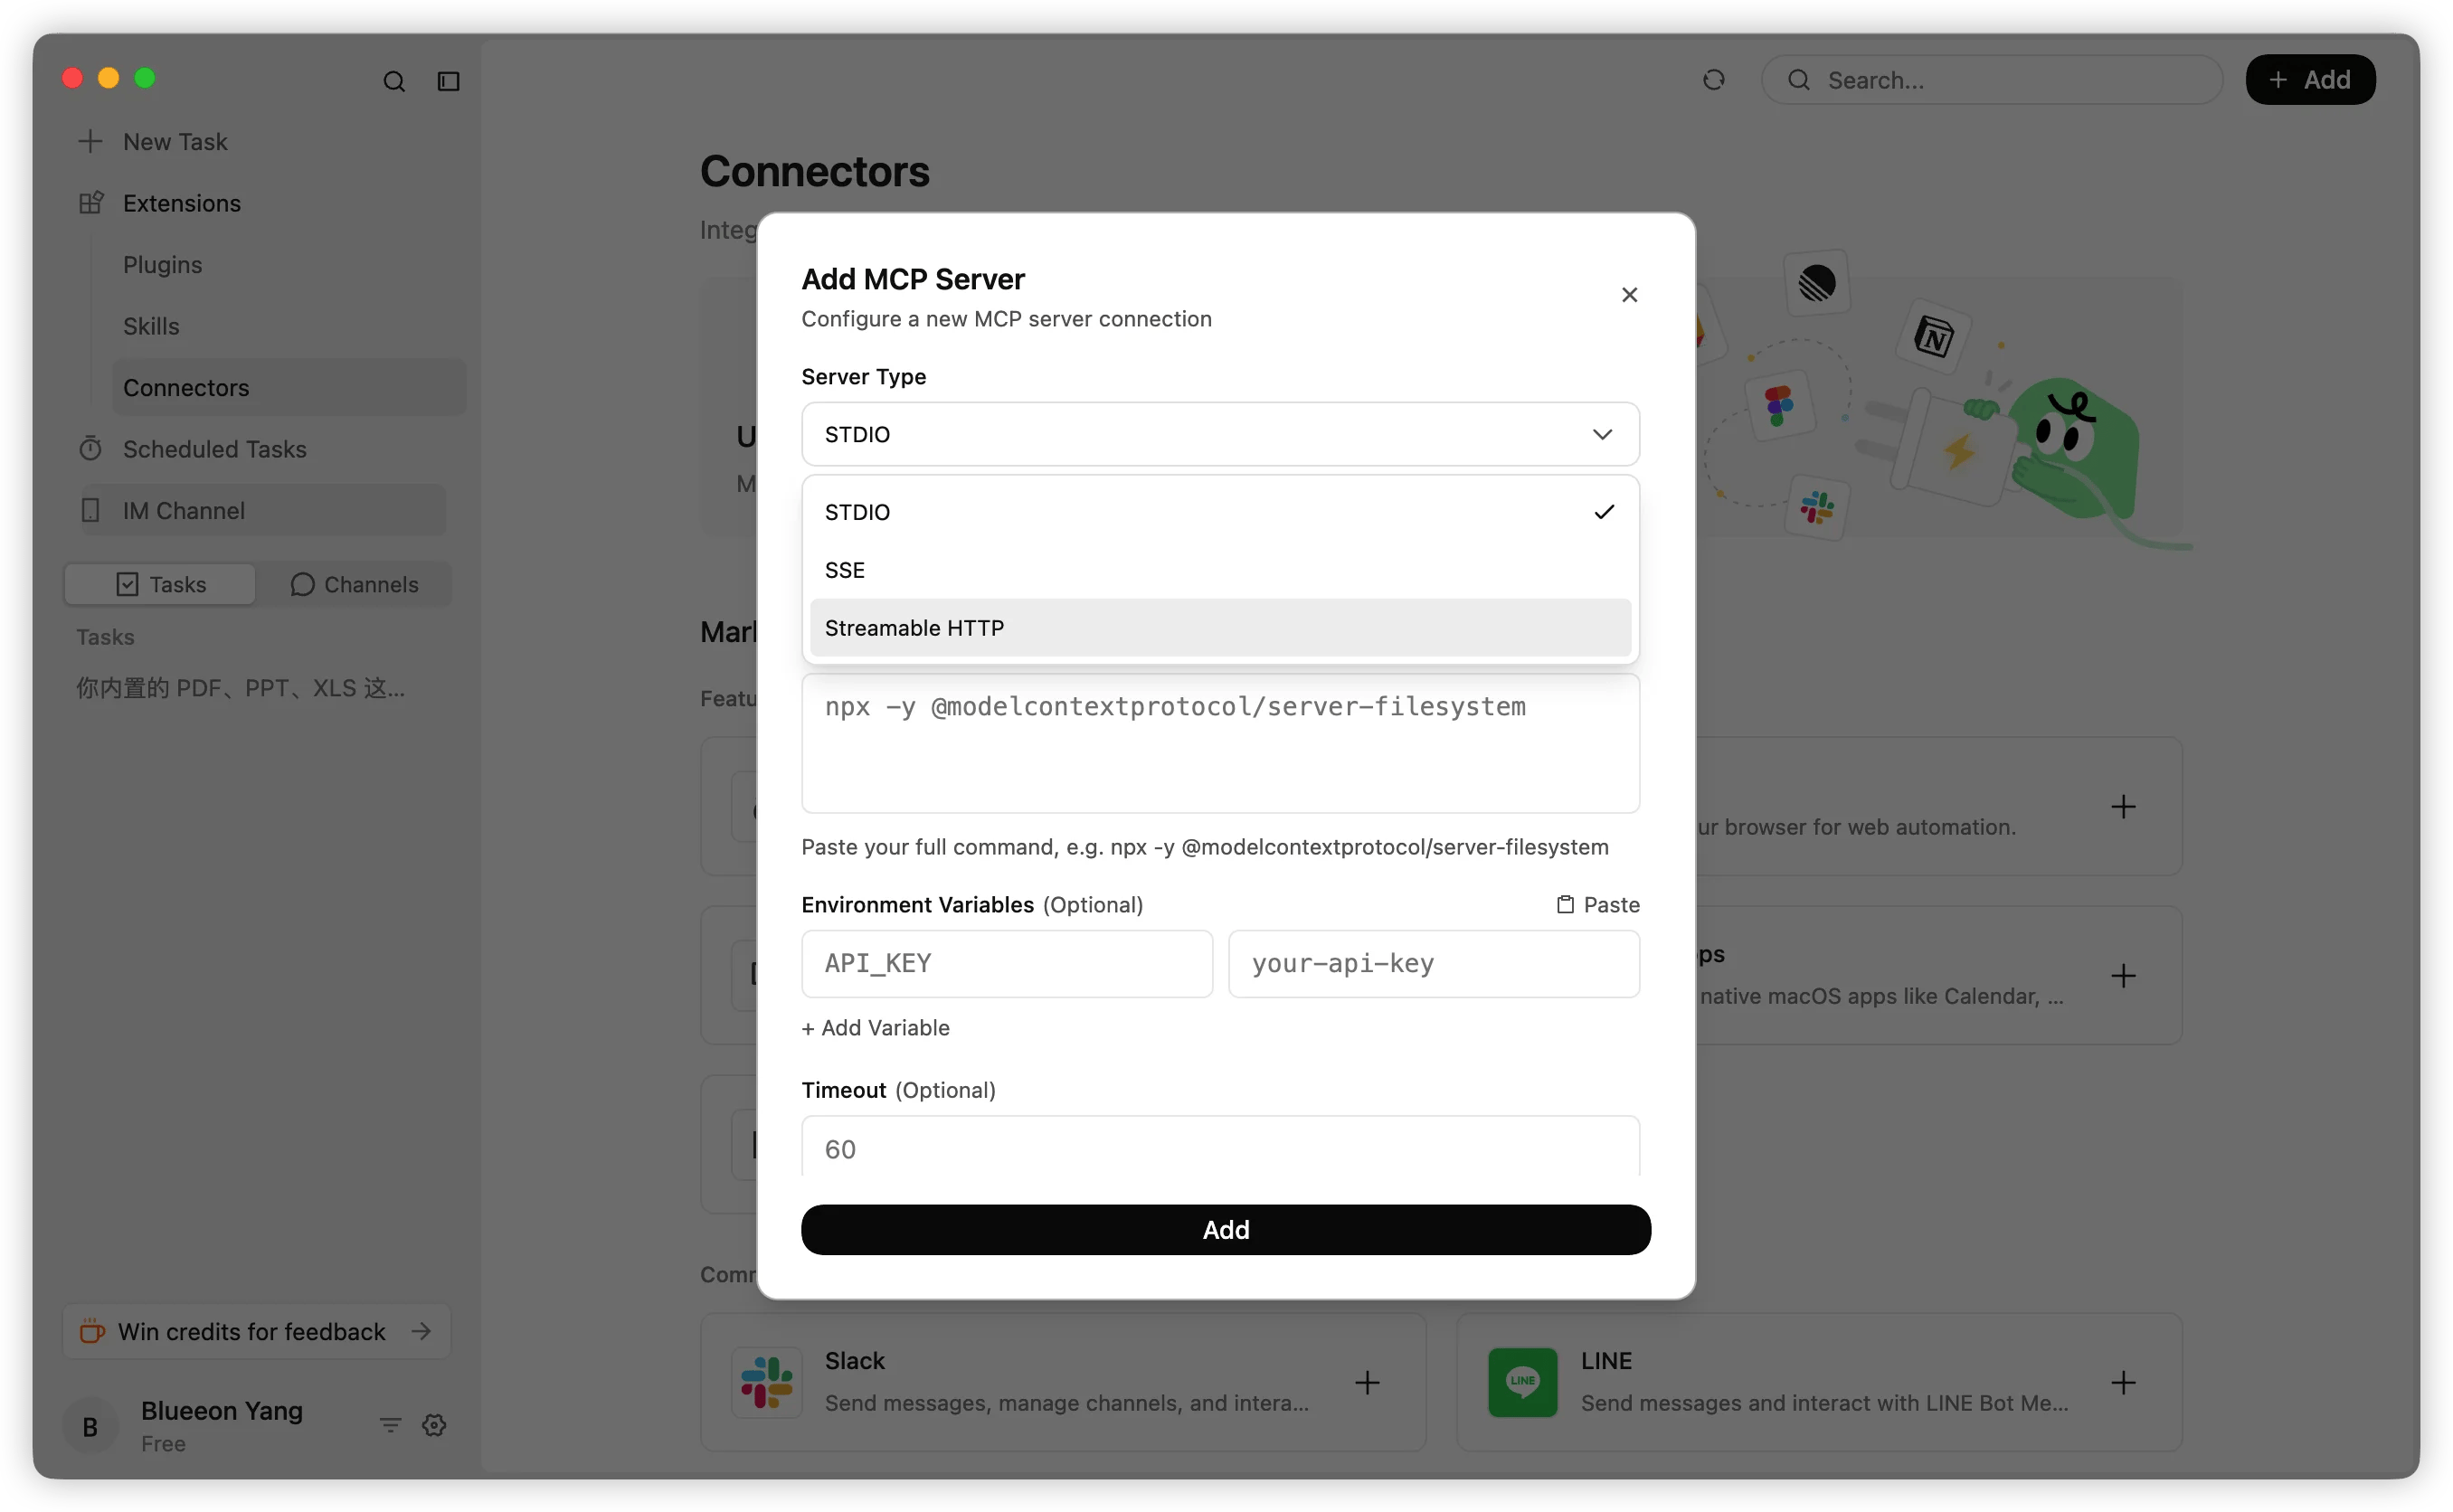
 In the **Add MCP Server** dialog, fill in the following:
* **Server Type**: `Streamable HTTP`
* **Server Name**: `linkly-ai`
* **Server URL**: `http://127.0.0.1:60606/mcp`
Click **Add** to finish.
In the **Add MCP Server** dialog, fill in the following:
* **Server Type**: `Streamable HTTP`
* **Server Name**: `linkly-ai`
* **Server URL**: `http://127.0.0.1:60606/mcp`
Click **Add** to finish.
 Complete [remote access configuration](/en/use-in-remote) first, with the
desktop tunnel showing ● Connected.
Click **Extensions → Connectors** in the left navigation.
Click **+ Add → Fill in Config Manually**.
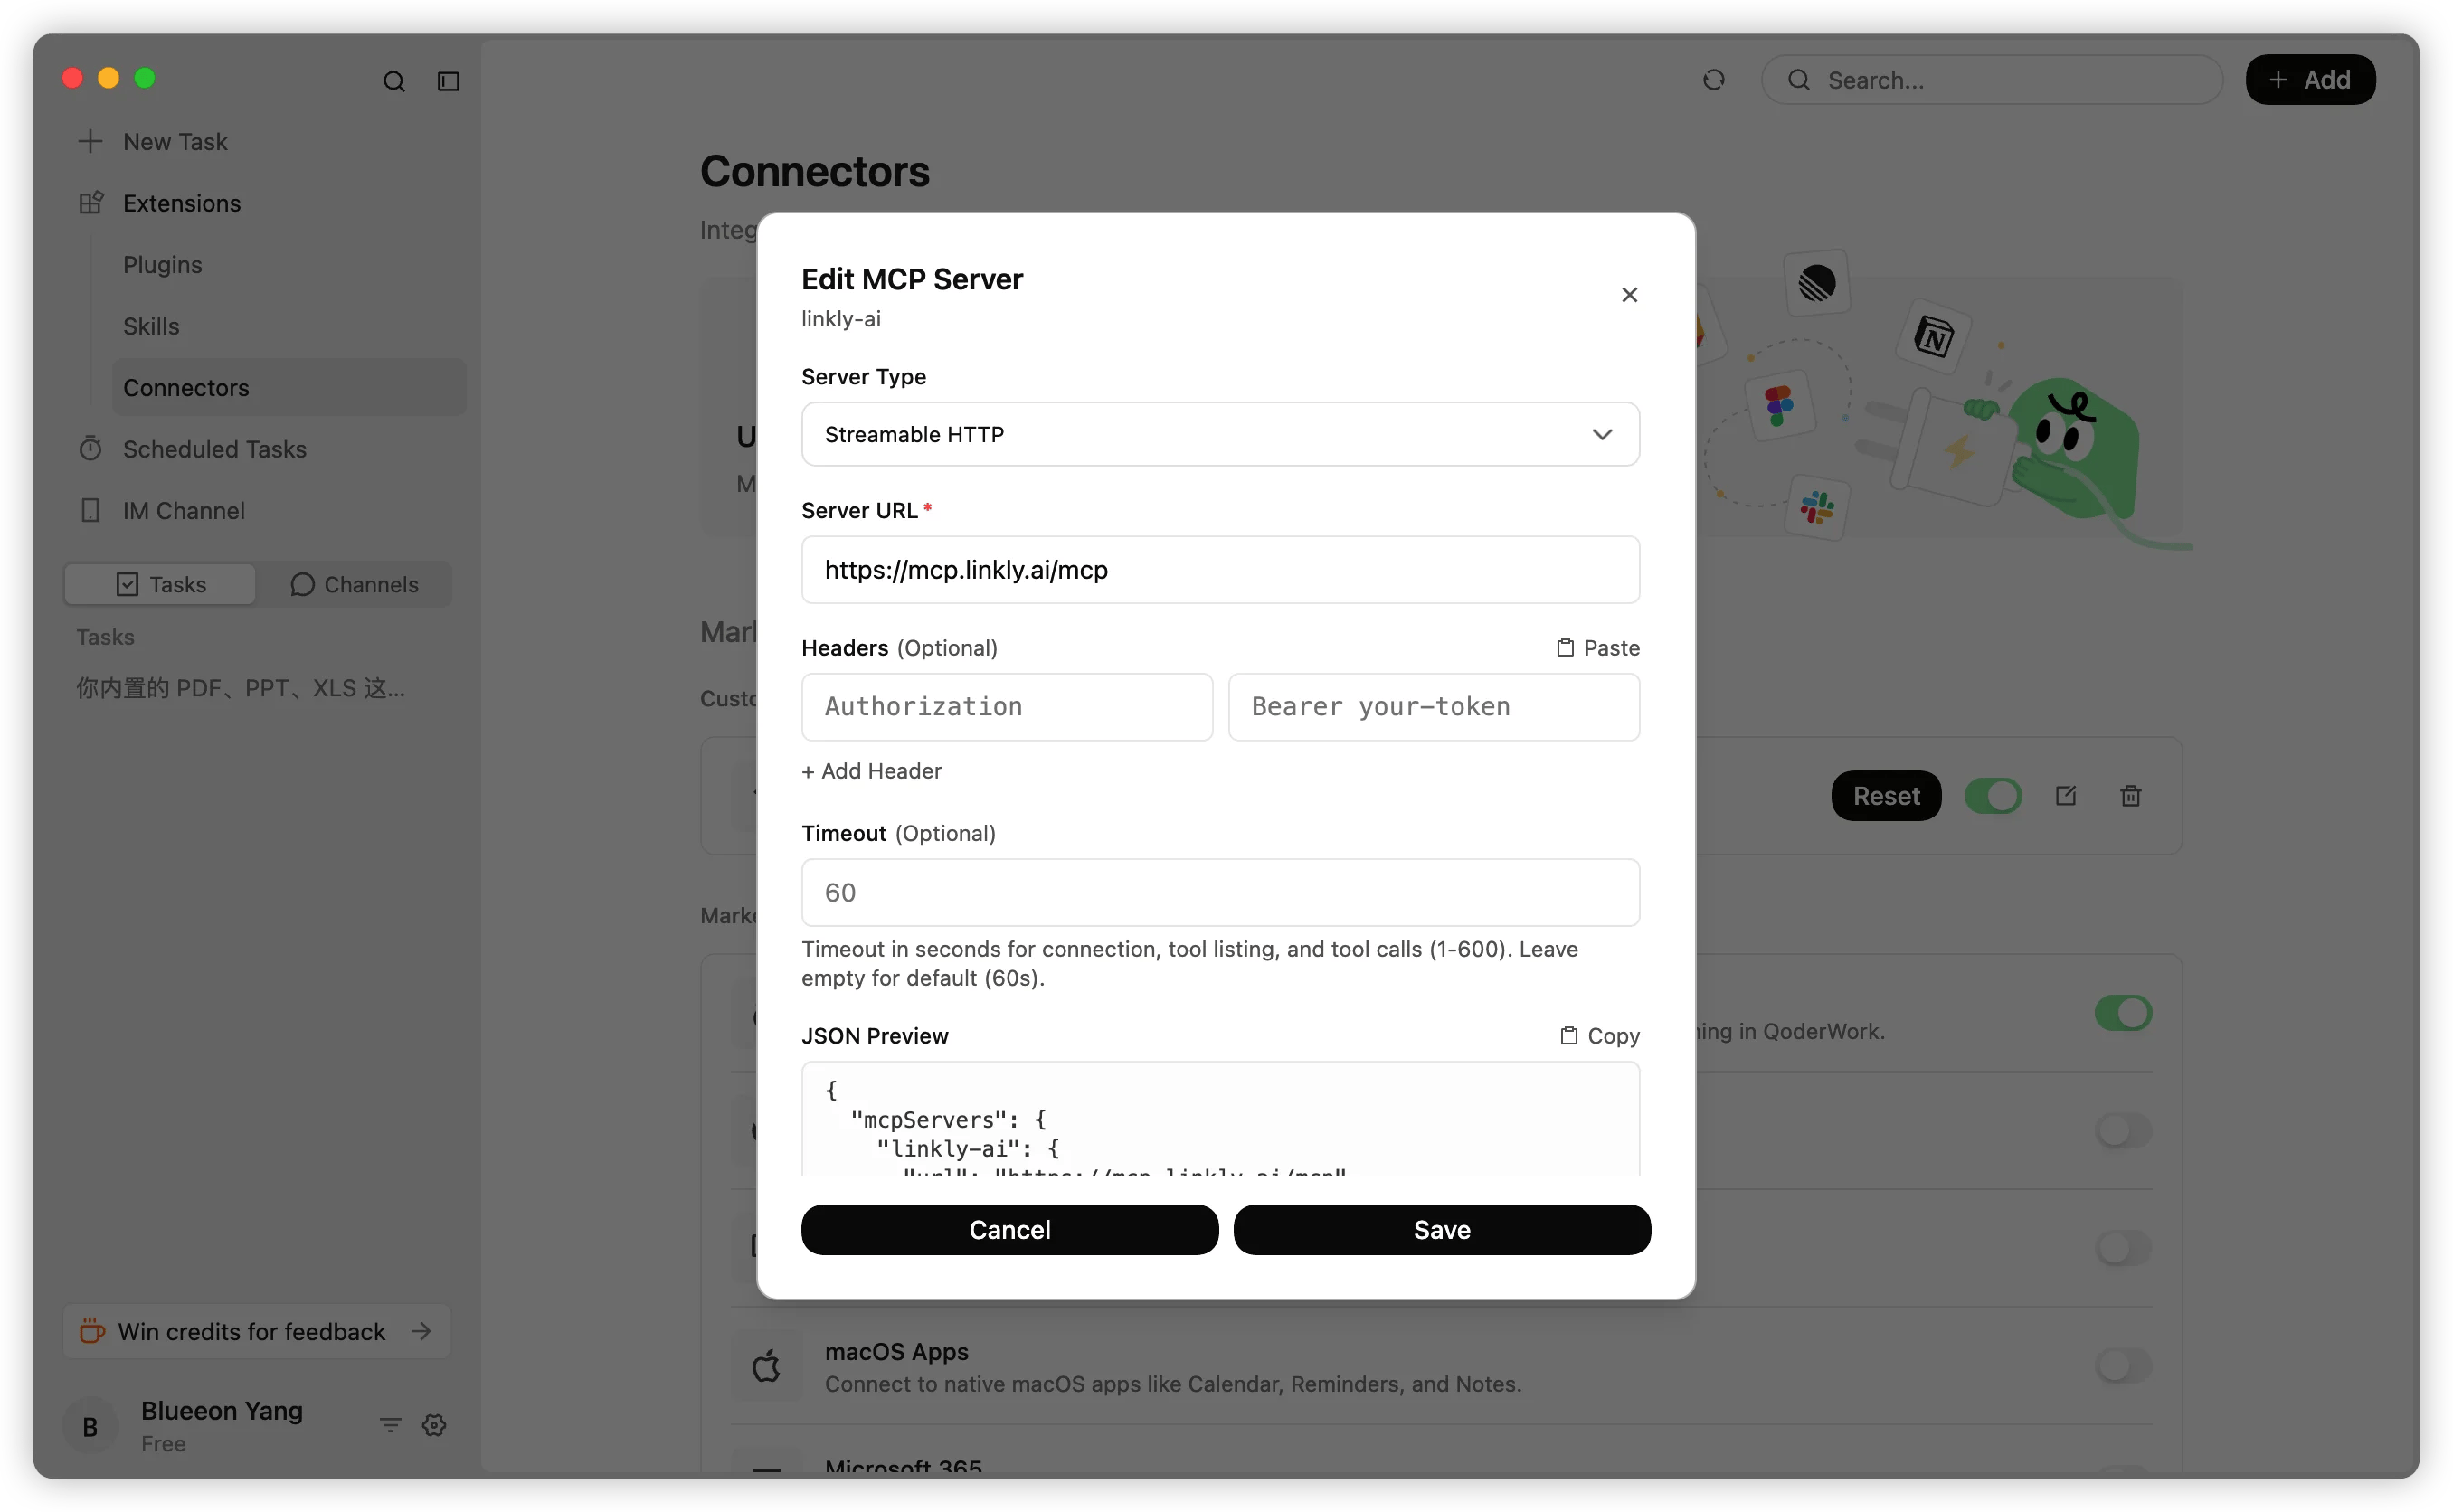
In the **Add MCP Server** dialog, fill in the following:
* **Server Type**: `Streamable HTTP`
* **Server Name**: `linkly-ai`
* **Server URL**: `https://mcp.linkly.ai/mcp`
Click **Add** to finish.
Complete [remote access configuration](/en/use-in-remote) first, with the
desktop tunnel showing ● Connected.
Click **Extensions → Connectors** in the left navigation.
Click **+ Add → Fill in Config Manually**.
In the **Add MCP Server** dialog, fill in the following:
* **Server Type**: `Streamable HTTP`
* **Server Name**: `linkly-ai`
* **Server URL**: `https://mcp.linkly.ai/mcp`
Click **Add** to finish.
 [Install Linkly AI CLI](/en/use-cli) first.
Click **Extensions → Connectors** in the left navigation.
Click **+ Add → Fill in Config Manually**.
In the **Add MCP Server** dialog, fill in the following:
* **Server Type**: `STDIO`
* **Command**: `linkly mcp`
Click **Add** to finish.
[Install Linkly AI CLI](/en/use-cli) first.
Click **Extensions → Connectors** in the left navigation.
Click **+ Add → Fill in Config Manually**.
In the **Add MCP Server** dialog, fill in the following:
* **Server Type**: `STDIO`
* **Command**: `linkly mcp`
Click **Add** to finish.
 ## Enable in Conversations
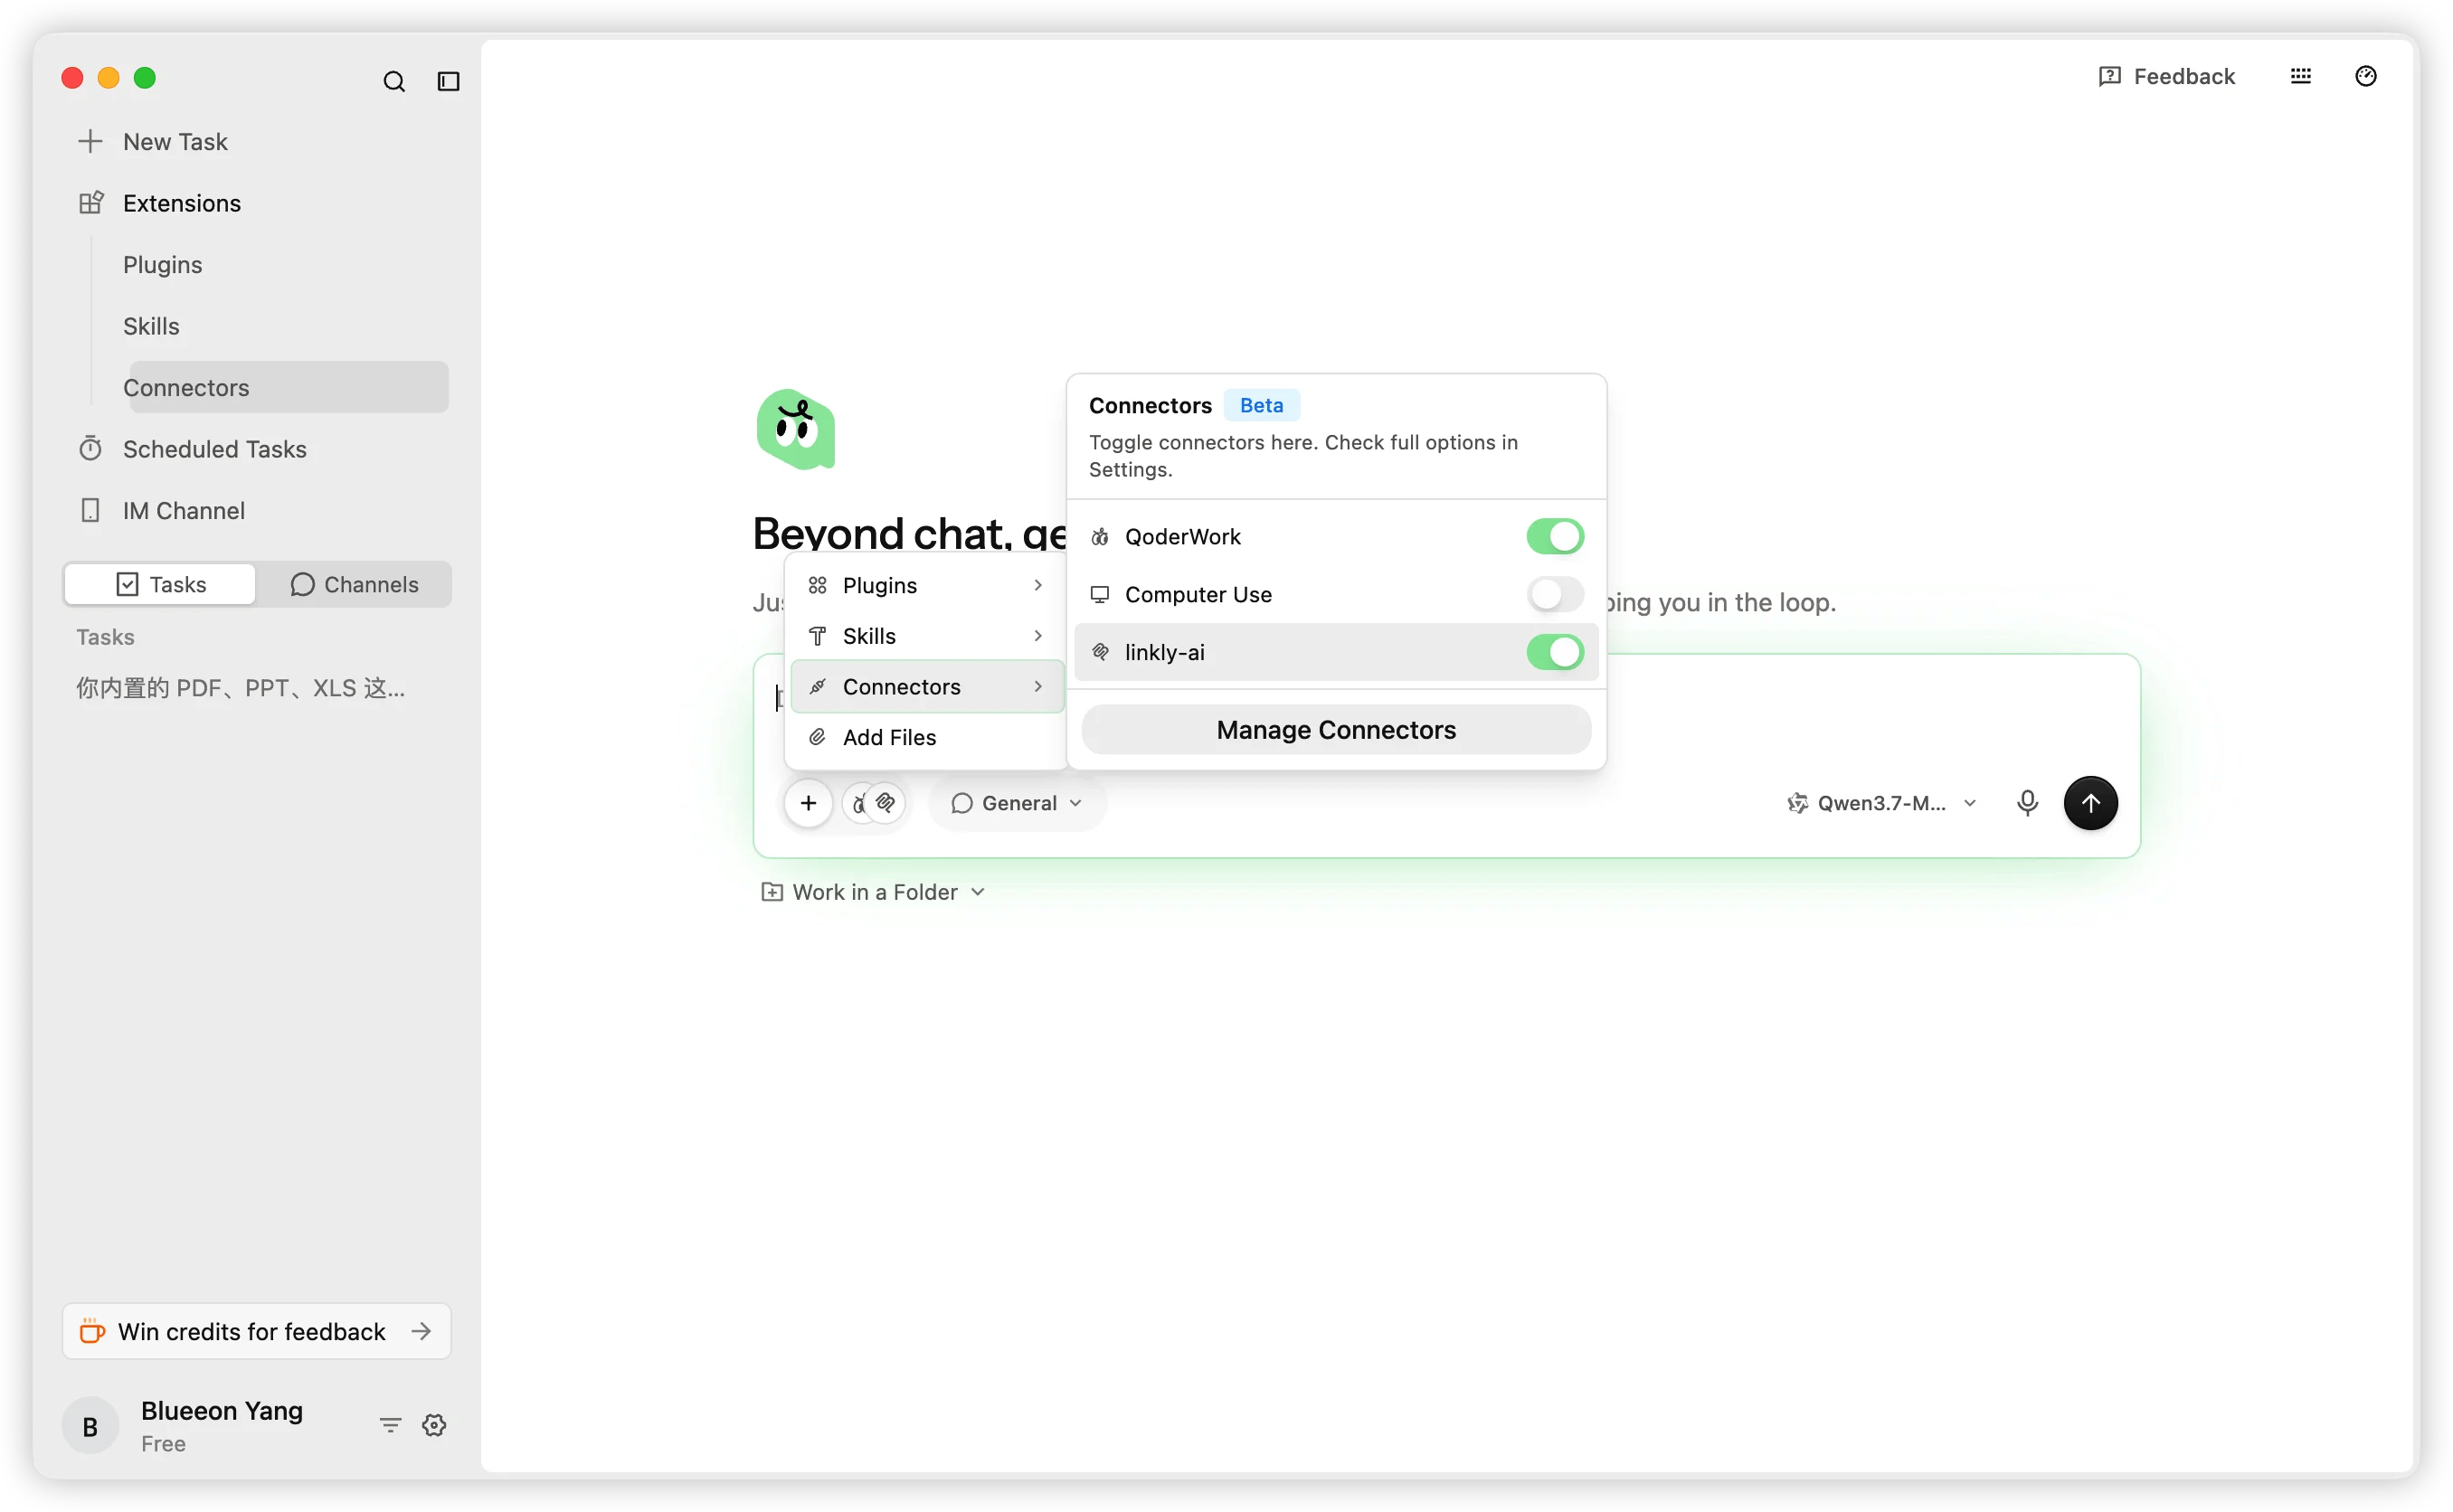
After adding, you still need to manually enable the connector in each
conversation. Click the plugin icon in the input toolbar, select
**Connectors**, and toggle on **linkly-ai**.
## Enable in Conversations
After adding, you still need to manually enable the connector in each
conversation. Click the plugin icon in the input toolbar, select
**Connectors**, and toggle on **linkly-ai**.
 ## FAQ
Switch to the **Installed** tab on the Connectors page to see the installed
list. If still not visible, try clicking the refresh button in the top
right.
Make sure the remote access feature in Linkly AI Desktop is enabled and the
desktop tunnel shows "Connected." You can check this in the MCP section of
Linkly AI settings.
Confirm Linkly AI CLI is correctly installed by running `linkly --version`
in a terminal.
## FAQ
Switch to the **Installed** tab on the Connectors page to see the installed
list. If still not visible, try clicking the refresh button in the top
right.
Make sure the remote access feature in Linkly AI Desktop is enabled and the
desktop tunnel shows "Connected." You can check this in the MCP section of
Linkly AI settings.
Confirm Linkly AI CLI is correctly installed by running `linkly --version`
in a terminal.