> ## Documentation Index
> Fetch the complete documentation index at: https://linkly.ai/docs/llms.txt
> Use this file to discover all available pages before exploring further.
# Using Linkly AI in WorkBuddy
> Integrate your Linkly AI local knowledge base with WorkBuddy, letting the AI work assistant search and read your private documents
## What You Can Do
When creating tasks in WorkBuddy, let AI first search your relevant local
materials through Linkly AI, then combine the retrieved results to complete
reports, proposals, and other tasks — outputs that are traceable and
grounded in real sources.
Combine your local knowledge base with built-in connectors like Tencent Docs
and Tencent Lexiang. WorkBuddy can simultaneously retrieve cloud
collaboration content and local private documents, covering a more complete
range of information sources.
Using WorkBuddy's Assistant feature, let AI call Linkly AI at any time
during conversations to search your notes, reference materials, and
historical documents — no need to manually upload attachments each time.
## Prerequisites
* [WorkBuddy](https://www.codebuddy.cn/docs/workbuddy/Quickstart) installed
* Linkly AI Desktop running with the MCP service active
## Configuration Steps
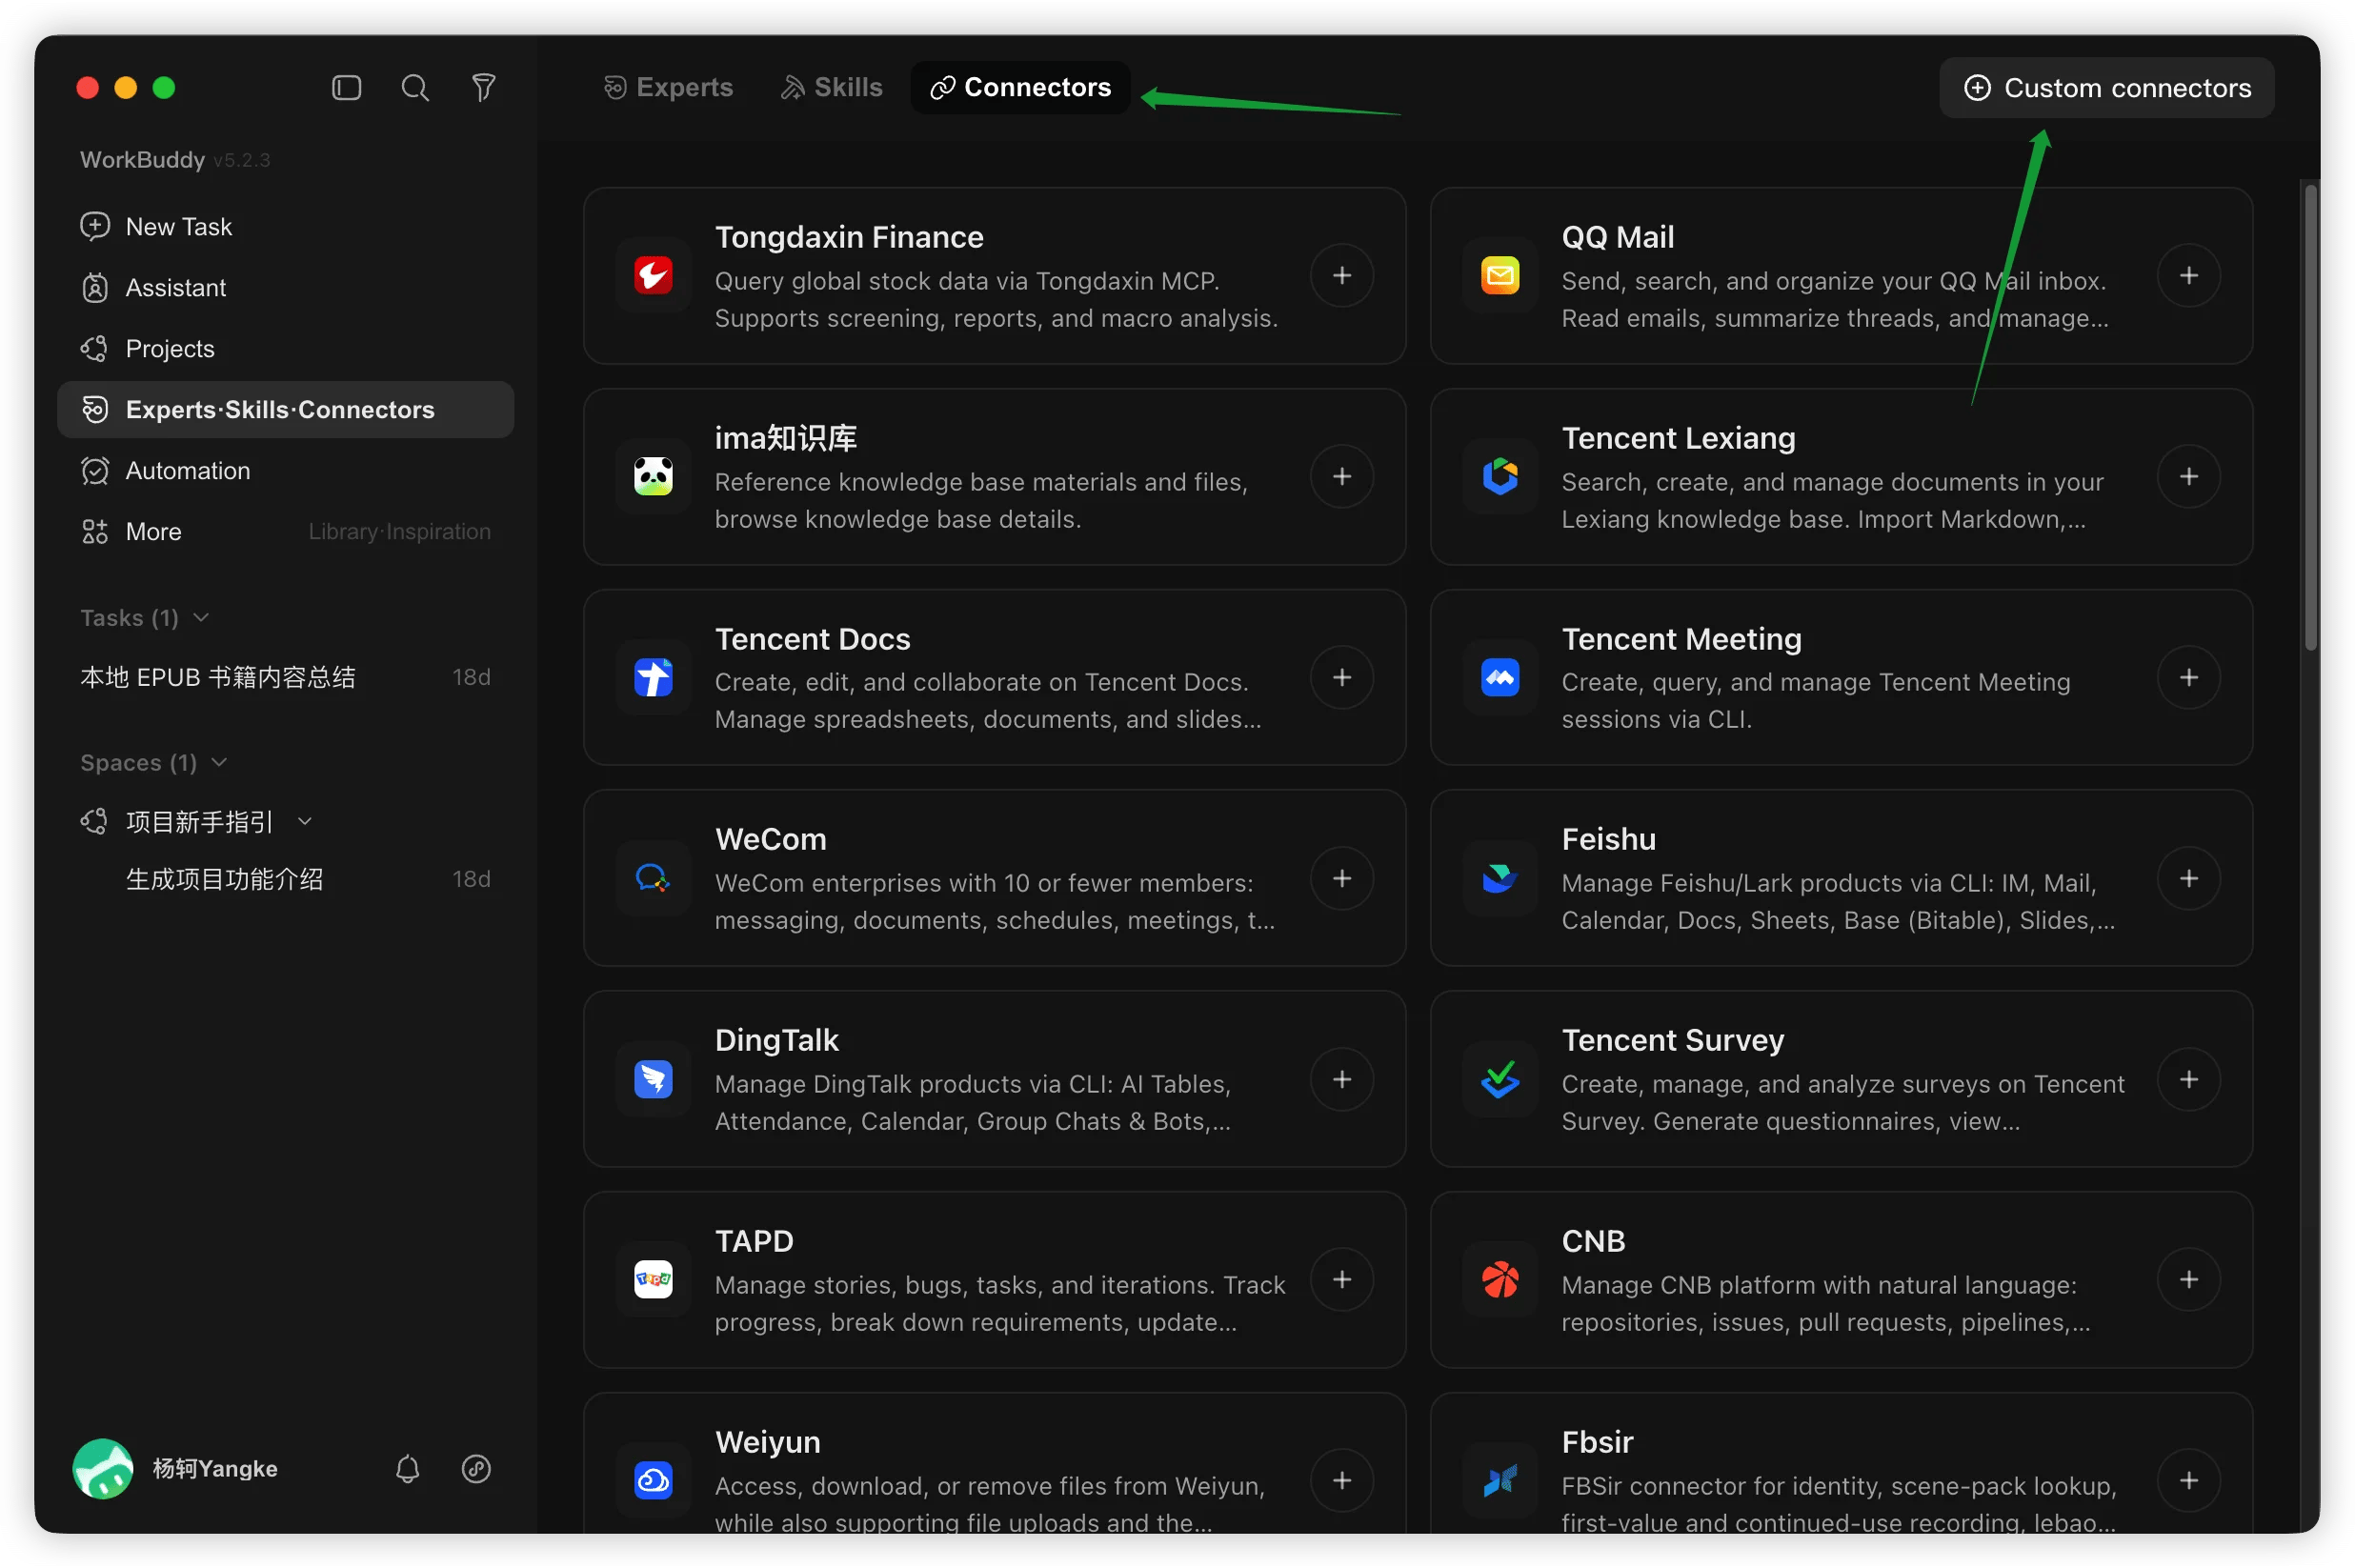
Click **Experts·Skills·Connectors** in the left navigation, switch to
the **Connectors** tab at the top, then click **Custom connectors** in
the top right.
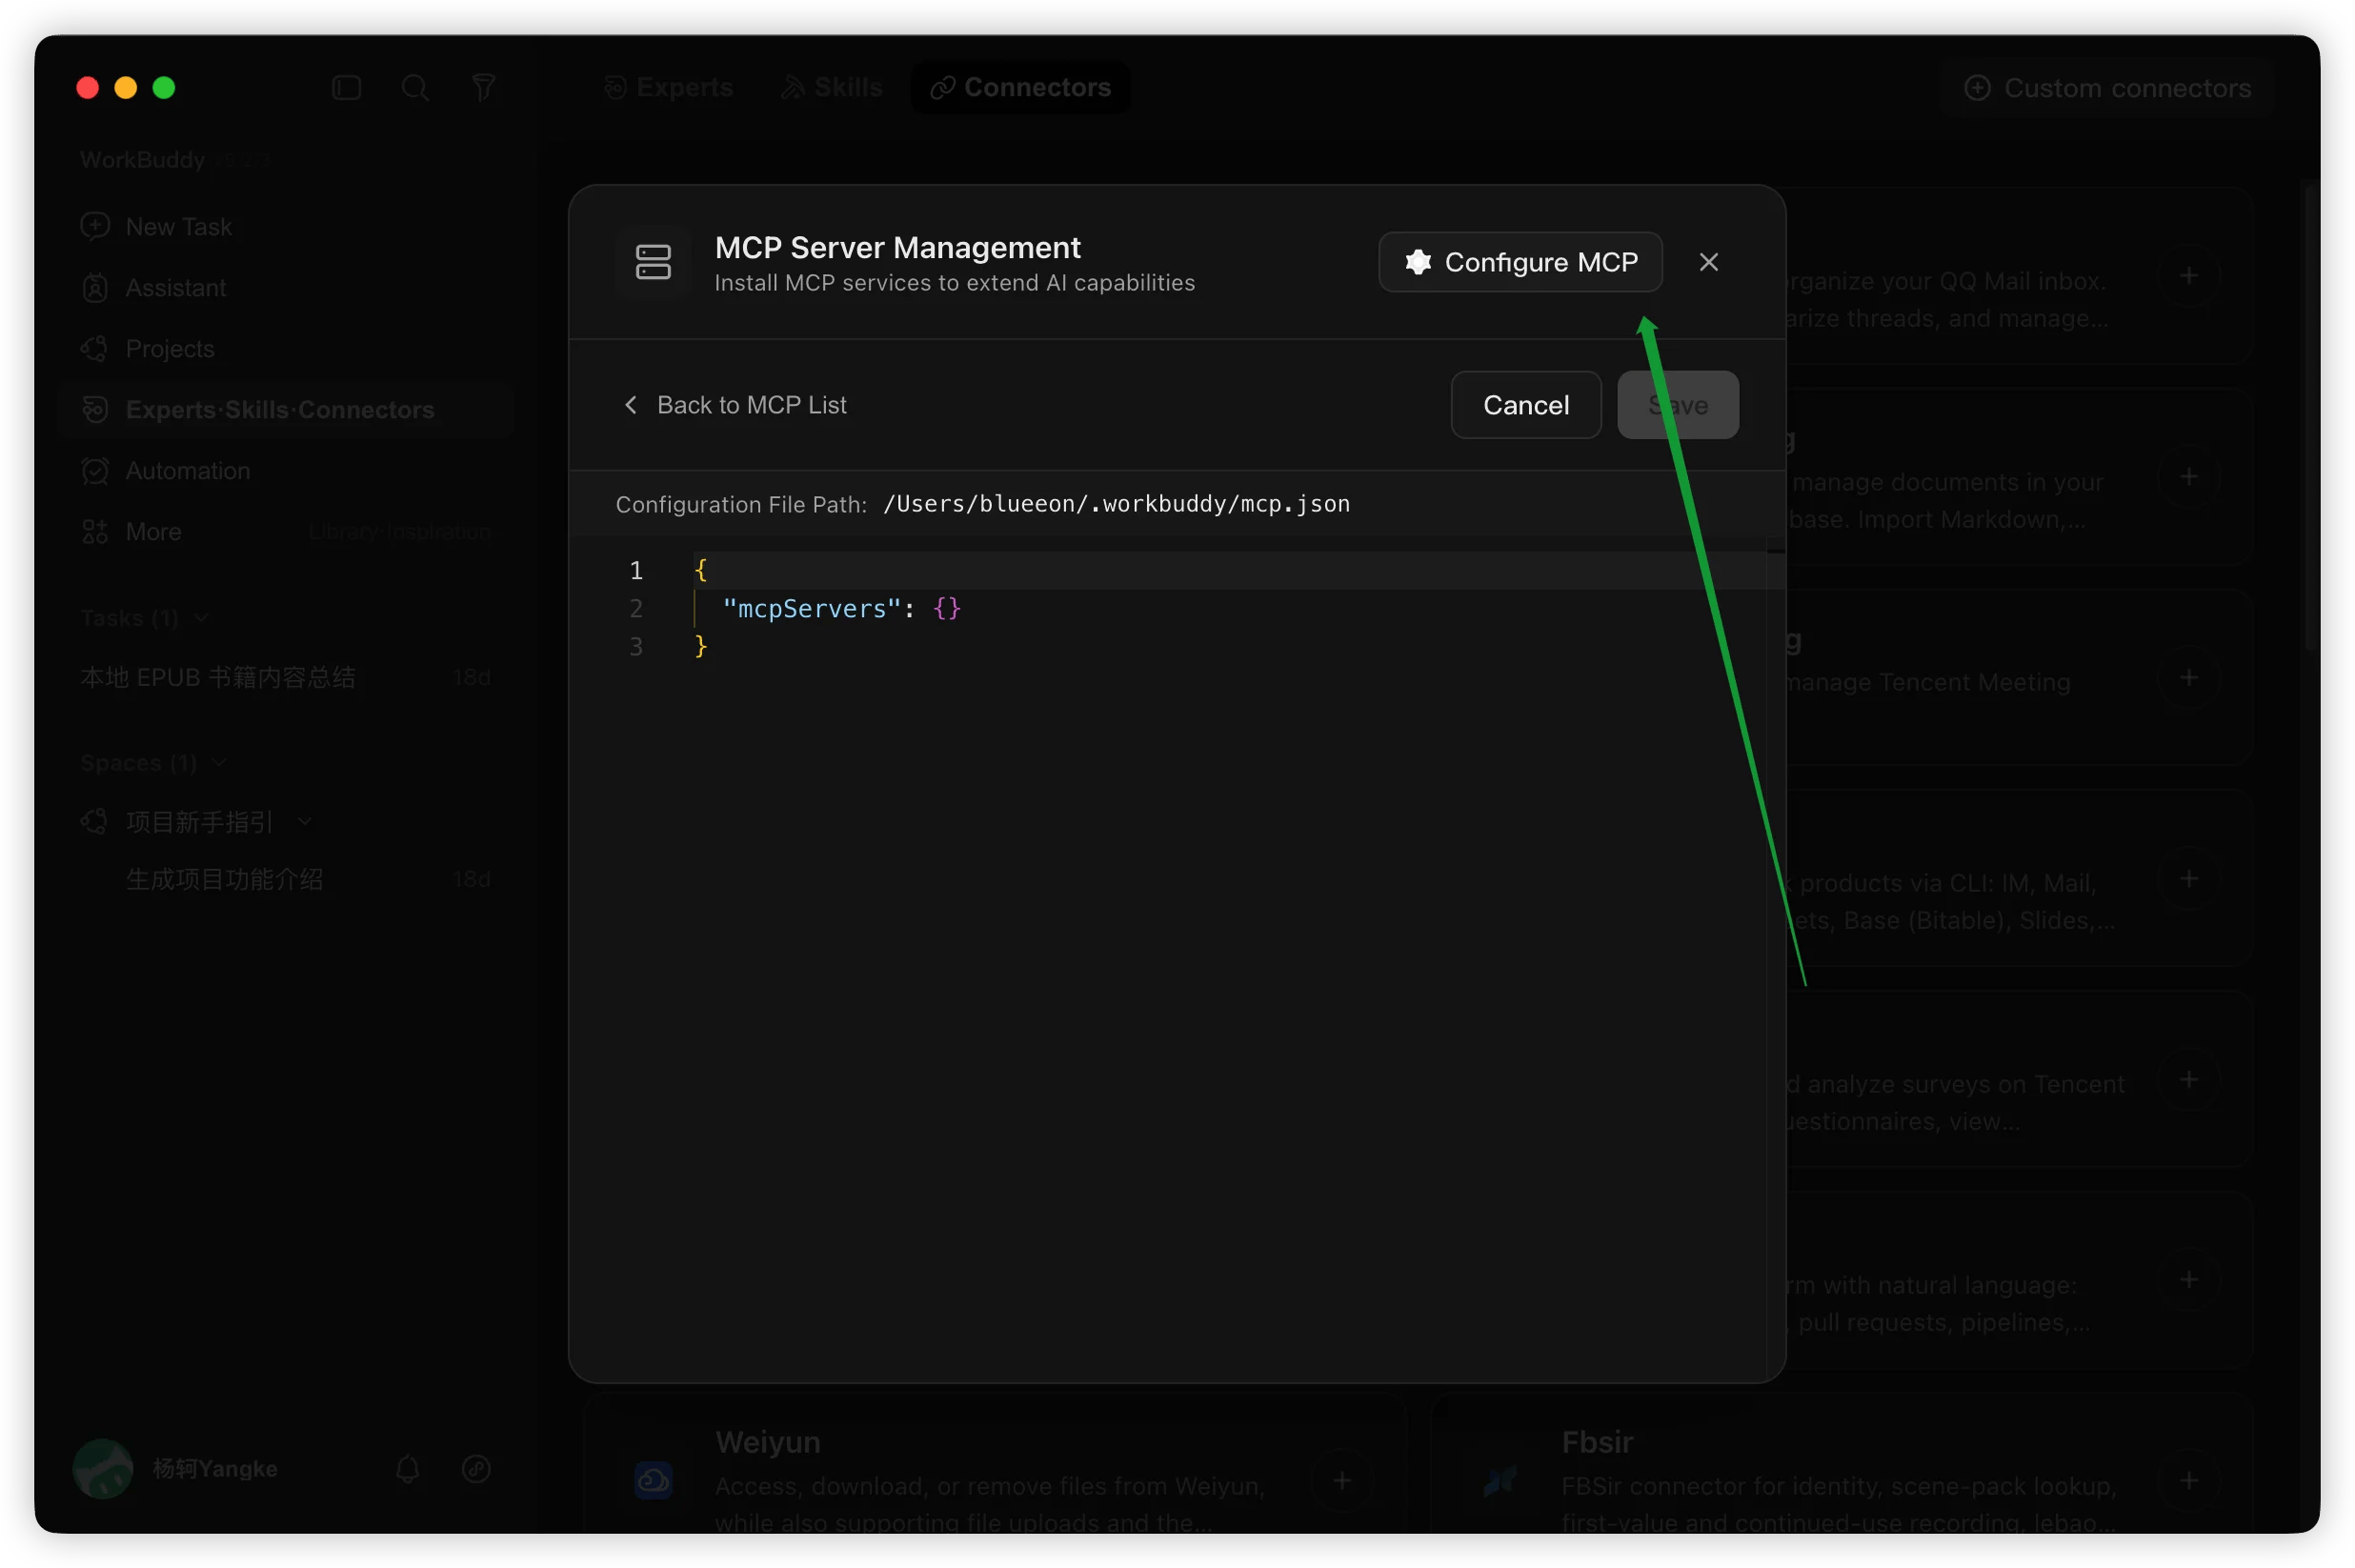
 In the **MCP Server Management** dialog that appears, click **Configure
MCP** in the top right to open the JSON configuration editor.
In the **MCP Server Management** dialog that appears, click **Configure
MCP** in the top right to open the JSON configuration editor.
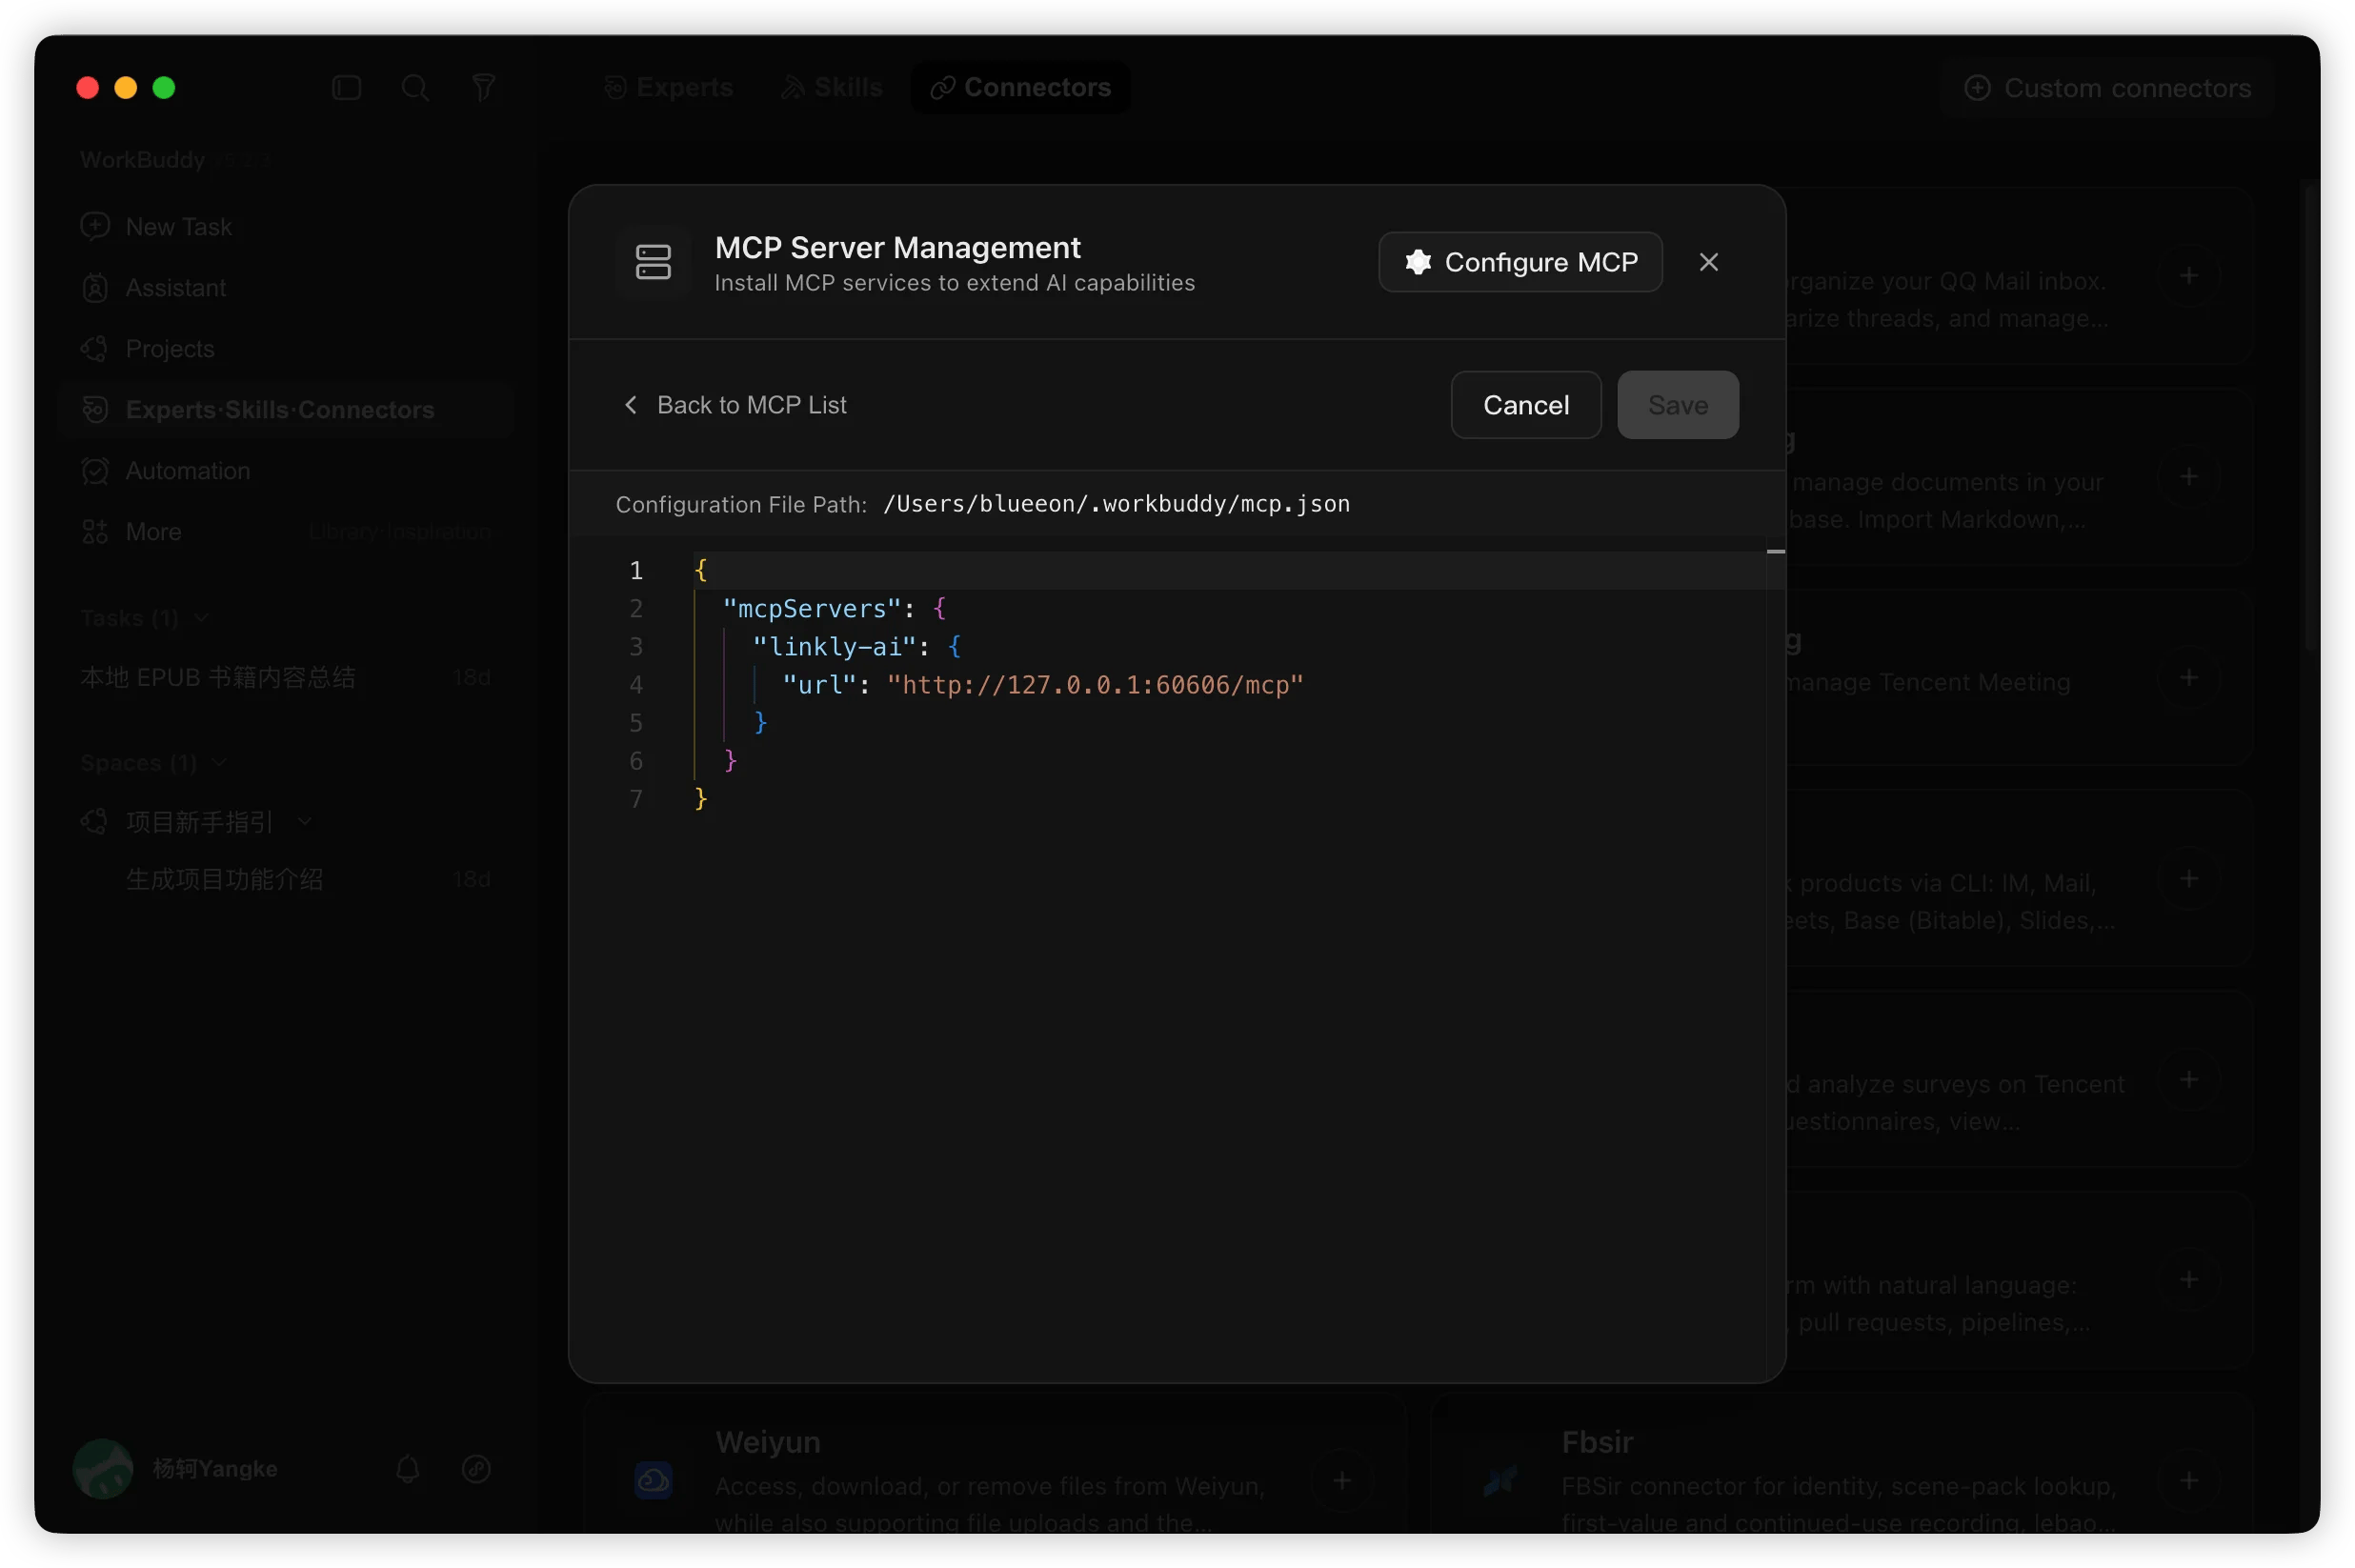
 Enter the following configuration in the editor, then click **Save**:
```json theme={null}
{
"mcpServers": {
"linkly-ai": {
"url": "http://127.0.0.1:60606/mcp"
}
}
}
```
Enter the following configuration in the editor, then click **Save**:
```json theme={null}
{
"mcpServers": {
"linkly-ai": {
"url": "http://127.0.0.1:60606/mcp"
}
}
}
```
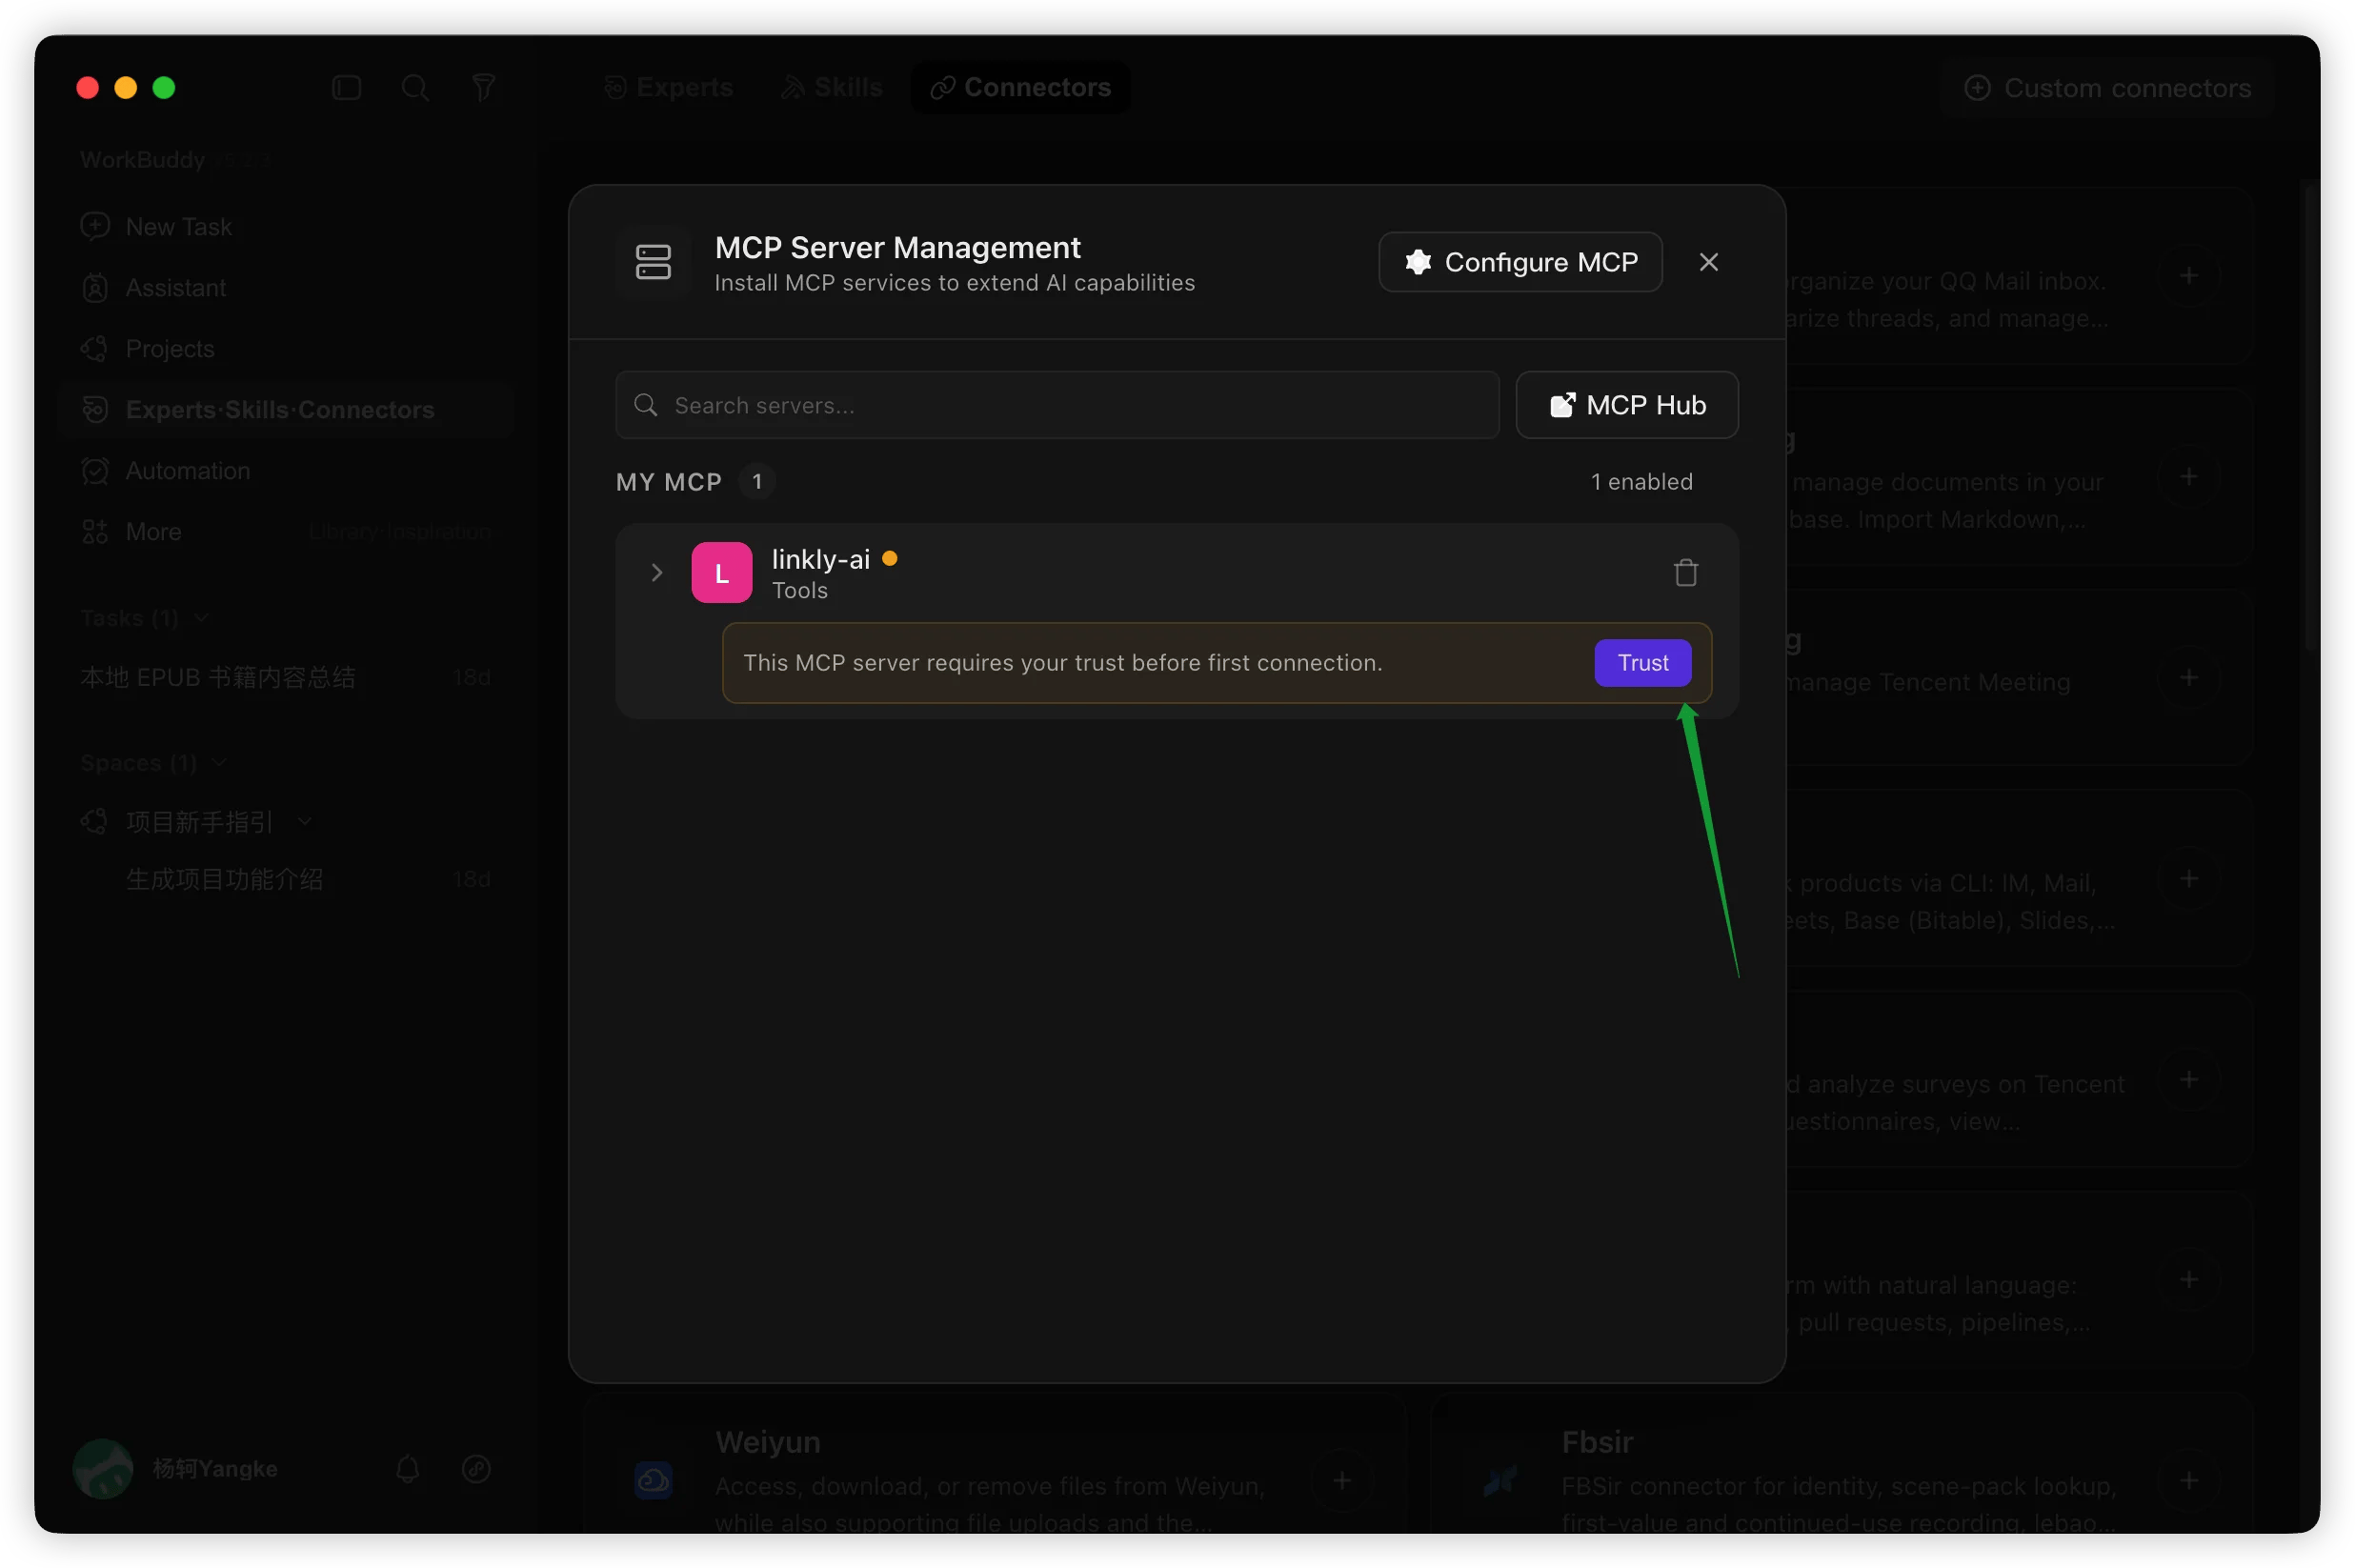
 After saving, return to the MCP list, find the **linkly-ai** entry, and
click **Trust** to complete the first-time authorization.
After saving, return to the MCP list, find the **linkly-ai** entry, and
click **Trust** to complete the first-time authorization.
 Complete [remote access configuration](/en/use-in-remote) first, with the
desktop tunnel showing ● Connected.
Same as above — go to **Connectors → Custom connectors → Configure
MCP**.
Enter the following configuration in the editor, then click **Save**:
```json theme={null}
{
"mcpServers": {
"linkly-ai": {
"url": "https://mcp.linkly.ai/mcp"
}
}
}
```
After saving, click **Trust** in the MCP list to authorize.
[Install Linkly AI CLI](/en/use-cli) first.
Same as above — go to **Connectors → Custom connectors → Configure
MCP**.
Enter the following configuration in the editor, then click **Save**:
```json theme={null}
{
"mcpServers": {
"linkly-ai": {
"command": "linkly",
"args": ["mcp"]
}
}
}
```
After saving, click **Trust** in the MCP list to authorize.
## Getting Started
Once configured, simply describe your needs when creating a new task in
WorkBuddy and AI will automatically call Linkly AI to search and read your local
documents.
Complete [remote access configuration](/en/use-in-remote) first, with the
desktop tunnel showing ● Connected.
Same as above — go to **Connectors → Custom connectors → Configure
MCP**.
Enter the following configuration in the editor, then click **Save**:
```json theme={null}
{
"mcpServers": {
"linkly-ai": {
"url": "https://mcp.linkly.ai/mcp"
}
}
}
```
After saving, click **Trust** in the MCP list to authorize.
[Install Linkly AI CLI](/en/use-cli) first.
Same as above — go to **Connectors → Custom connectors → Configure
MCP**.
Enter the following configuration in the editor, then click **Save**:
```json theme={null}
{
"mcpServers": {
"linkly-ai": {
"command": "linkly",
"args": ["mcp"]
}
}
}
```
After saving, click **Trust** in the MCP list to authorize.
## Getting Started
Once configured, simply describe your needs when creating a new task in
WorkBuddy and AI will automatically call Linkly AI to search and read your local
documents.
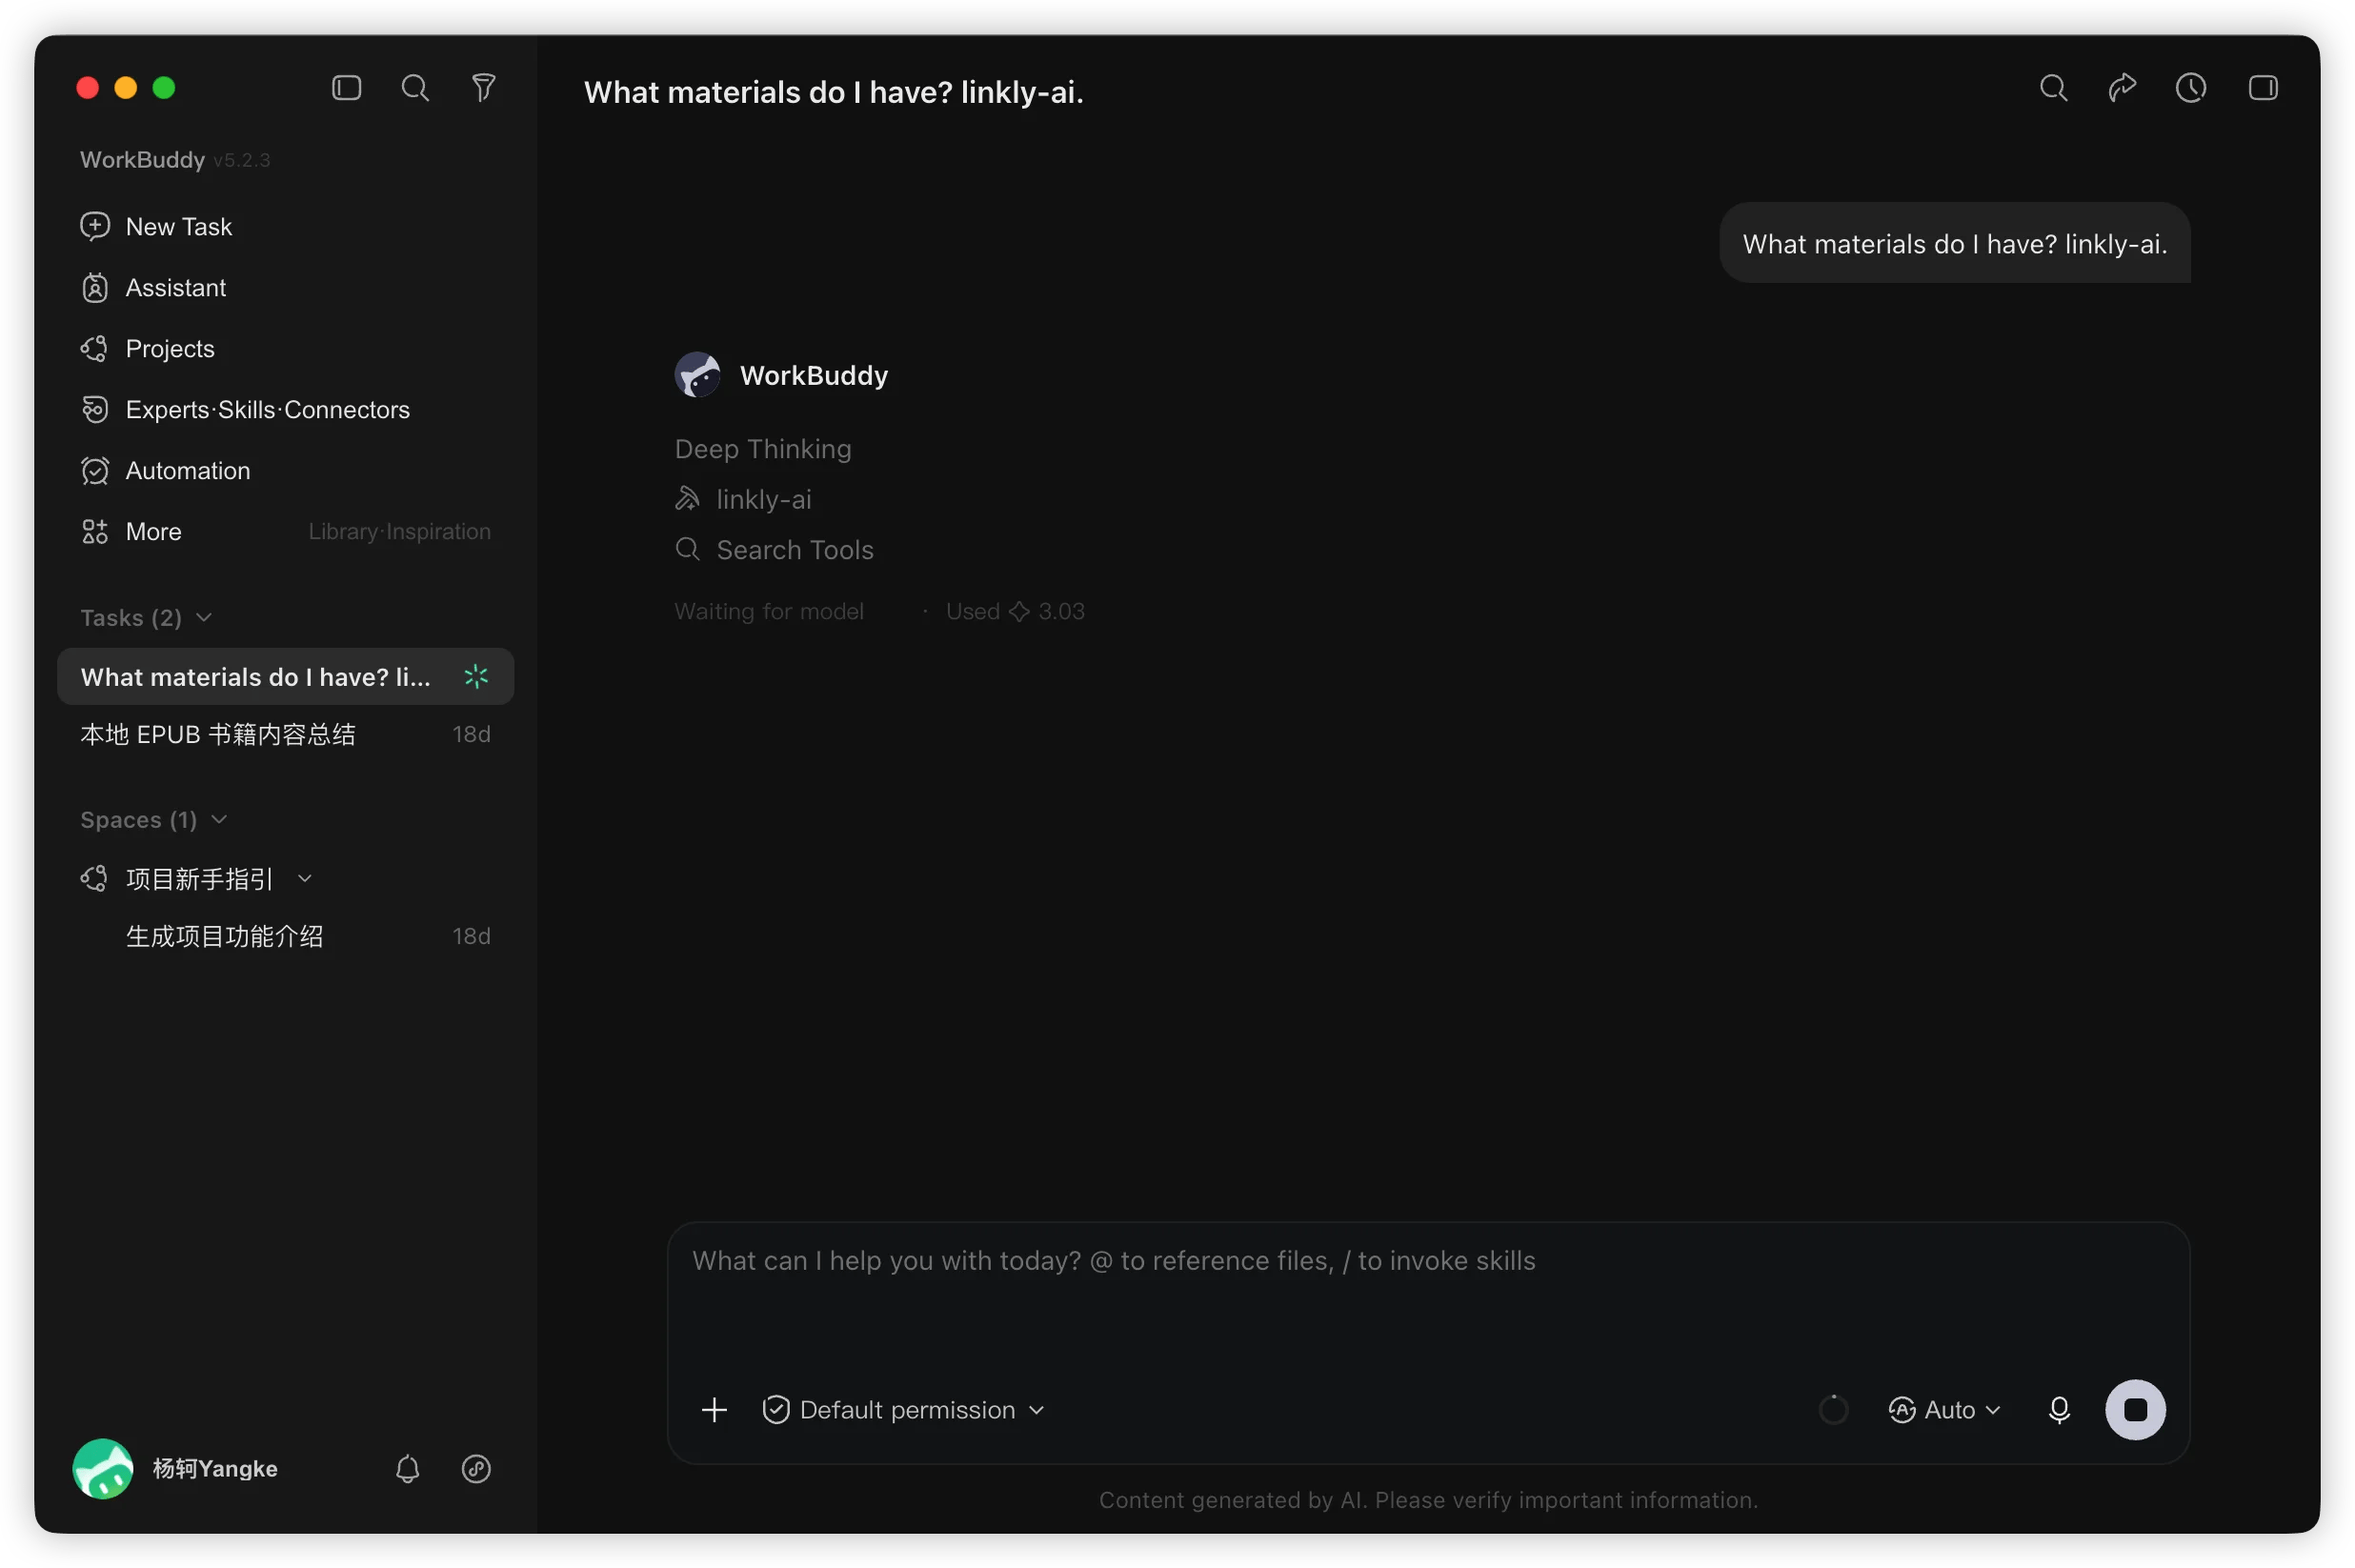 Examples:
* "Search my local materials and compile an analysis report on XX"
* "What content about project requirements is in my documents?"
## FAQ
Yellow means it is connecting — wait a moment and it usually turns green. If
it stays yellow, check that Linkly AI Desktop is running and the MCP service
shows Running.
Click **Back to MCP List** to return to the list, then expand the linkly-ai
entry to see the Trust button.
WorkBuddy's user-level MCP configuration is stored at
`~/.workbuddy/mcp.json`. The full path is shown in the Configuration File
Path field at the top of the Configure MCP editor.
Examples:
* "Search my local materials and compile an analysis report on XX"
* "What content about project requirements is in my documents?"
## FAQ
Yellow means it is connecting — wait a moment and it usually turns green. If
it stays yellow, check that Linkly AI Desktop is running and the MCP service
shows Running.
Click **Back to MCP List** to return to the list, then expand the linkly-ai
entry to see the Trust button.
WorkBuddy's user-level MCP configuration is stored at
`~/.workbuddy/mcp.json`. The full path is shown in the Configuration File
Path field at the top of the Configure MCP editor.